Laminate flooring repair doesn’t have to feel overwhelming. Most issues can be fixed quickly with the right tools and techniques. Whether you’re dealing with cracks, scratches, or gaps, addressing these problems early can keep your flooring looking great for years to come.
Here’s how you can tackle common laminate flooring issues like a pro.
Understanding Common Laminate Flooring Issues
Laminate flooring is durable but not immune to wear and tear. Everyday activities, shifting furniture, or environmental changes can lead to issues like cracks, scratches, or gaps. Understanding these problems is the first step in repairing them effectively.
Cracks and Chips
Cracks and chips often occur in high-traffic areas or where heavy objects are dropped. These small imperfections can quickly grow if ignored. For example, a crack might expand under continued pressure, making the floor less stable. Chips can expose the underlayer, which not only looks unattractive but can also invite moisture damage.
Quick Fix: Use a laminate repair putty or wax filler in a matching color. Smooth it into the damaged area with a putty knife and wipe away excess for a seamless finish.
Scratches and Surface Scuffs
Scratches and scuffs are the most common issues with laminate flooring. They’re often caused by dragging furniture, pet claws, or even everyday dirt particles acting like sandpaper underfoot. While surface scuffs may seem minor, they can dull the flooring’s finish over time.
Quick Fix: Use a laminate flooring repair kit with touch-up markers or wax crayons. Buff the area gently after applying the color to blend it into the surrounding surface.
Warping and Buckling
Warping and buckling occur when moisture seeps into the laminate or when the flooring doesn’t have enough room to expand and contract with temperature changes. These issues can make walking on the floor uneven and potentially dangerous.
Quick Fix: For warped planks, consider replacing them if the damage is severe. To prevent further issues, check for moisture sources and ensure proper room ventilation.
Gaps Between Planks
Over time, gaps can form between laminate planks due to fluctuations in temperature or improper installation. These gaps not only disrupt the look of the floor but also create areas where dirt can collect.
Quick Fix: Use floor clamps to pull the planks back together. For a more permanent fix, fill gaps with color-matching caulk or adhesive to keep them sealed.
Essential Tools and Materials for Laminate Flooring Repair
Having the right tools and materials on hand makes laminate flooring repair straightforward. Here’s what you’ll need to get started.
Must-Have Repair Tools
- Putty Knife: This is used to fill cracks and chips smoothly.
- Touch-Up Markers or Wax Crayons: Ideal for scratches and surface scuffs.
- Clamps: Useful for pulling planks back together when dealing with gaps.
- Utility Knife: To cut and replace damaged planks with precision.
- Sandpaper: For smoothing filled areas and blending repairs seamlessly.
Choosing the Right Repair Materials
- Laminate Repair Kits: These often include putty, markers, and wax fillers in a range of colors to match your flooring.
- Adhesives: Use high-strength, waterproof adhesives for securing loose planks or fixing gaps.
- Replacement Planks: Always keep extra laminate planks from your original installation for severe damage repairs.
- Moisture Barriers: To prevent future warping, especially if moisture caused the original damage.
Step-by-Step Laminate Flooring Repair Guide
Tackling laminate flooring repair is simpler than it seems when you have a clear process. Each issue requires specific steps to fix it effectively. Follow this guide to address common problems and keep your flooring looking and functioning like new.
Fixing Cracks and Chips
Cracks and chips can make your laminate flooring look worn out and vulnerable to further damage. Repairing these flaws helps maintain both appearance and durability.
- Step 1: Clean the damaged area to remove dust or debris. Use a slightly damp cloth and let the area dry completely.
- Step 2: Apply laminate repair putty or a wax filler in a matching color to the crack or chip. These are available in laminate repair kits.
- Step 3: Use a putty knife to smooth the filler, ensuring it’s flush with the surrounding surface.
- Step 4: Wipe away any excess filler and let it dry as per the manufacturer’s instructions.
- Step 5: Once dry, lightly sand the repaired area for a seamless finish.
Removing Scratches and Scuffs
Scratches and scuffs are inevitable, but they don’t have to ruin the look of your flooring. Addressing them quickly prevents further wear and tear.
- Step 1: Clean the surface to ensure no dirt or dust interferes with the repair.
- Step 2: Use a laminate touch-up marker or wax crayon in the same shade as your flooring to color the scratch.
- Step 3: Blend the color by buffing the area gently with a soft cloth.
- Step 4: For deeper scratches, consider applying a laminate repair putty and sanding it down for an even finish.
Repairing Warped or Buckled Planks
Warped or buckled planks can create an uneven surface, which is both unsightly and a potential tripping hazard. Address these problems to restore the floor’s stability.
- Step 1: Identify the cause of the warping, such as moisture or lack of expansion space.
- Step 2: If the damage is minor, weigh down the affected planks with a heavy object to flatten them over time.
- Step 3: For severe warping, carefully remove the damaged plank using a utility knife or pry bar.
- Step 4: Replace the plank with one of the same type and size, securing it with adhesive if necessary.
- Step 5: Ensure proper ventilation or moisture control to prevent future warping.
Closing Gaps Between Planks
Gaps between planks not only affect aesthetics but also collect dirt, making cleaning harder. Fixing these gaps is simple with the right approach.
- Step 1: Place a floor clamp across the affected planks and tighten it to pull them back together.
- Step 2: Use a color-matching caulk or adhesive to fill any visible gaps.
- Step 3: Smooth the caulk with a putty knife and wipe away excess material.
- Step 4: Allow the adhesive to cure fully before walking on the repaired section.
Preventive Measures to Avoid Future Damage
Preventing laminate flooring damage is easier and more cost-effective than frequent repairs. Simple practices can protect your floors for years.
Maintaining Proper Humidity Levels
Laminate flooring is sensitive to changes in humidity, which can cause warping or gaps over time. Maintaining stable conditions reduces the likelihood of these issues.
- Use a humidifier during winter to prevent the air from becoming too dry.
- In humid climates, use a dehumidifier or air conditioner to control moisture levels.
- Aim to keep indoor humidity between 35–55% for optimal results.
Using Protective Pads and Rugs
Furniture and heavy objects can cause dents, scratches, or scuffs on laminate flooring. Protective measures can minimize this damage.
- Add felt pads to the bottom of furniture legs to prevent scratches during movement.
- Use area rugs or mats in high-traffic areas like hallways and entryways.
- Avoid dragging heavy furniture across the floor; lift and place it instead.
Regular Cleaning Tips
Regular maintenance keeps laminate flooring looking fresh and reduces the need for extensive repairs.
- Sweep or vacuum your floor daily to remove dirt and debris that can cause scratches.
- Mop the floor weekly with a damp mop and a laminate-safe cleaner. Avoid excessive water, as laminate is prone to moisture damage.
- Clean spills immediately to prevent staining or swelling.
Common Mistakes to Avoid
Even with the best intentions, certain mistakes during laminate flooring repair or maintenance can make problems worse. Knowing what to avoid helps ensure your floors stay in great condition.
Overusing Water During Cleaning
Using too much water when cleaning laminate flooring can cause significant damage. Laminate is not waterproof, and excess moisture can seep into the seams, leading to swelling, warping, or even mold growth. While mopping, use a damp—not wet—mop, and ensure no water pools on the surface. Spot-clean spills immediately to prevent moisture from penetrating the planks.
Skipping Proper Color Matching for Repairs
When fixing cracks, scratches, or chips, failing to match the repair material’s color to your flooring can result in obvious, unsightly patches. Take the time to find touch-up markers, wax fillers, or repair putty that closely matches your laminate’s tone. Test the color on an inconspicuous area before applying it to ensure a seamless look. Proper color matching ensures the repaired area blends naturally with the rest of the floor.
Ignoring Underlying Issues
Repairing visible damage without addressing the root cause often leads to recurring problems. For example, fixing a warped plank without identifying the moisture source can result in repeated warping. Similarly, gaps between planks may return if temperature fluctuations or improper installation aren’t resolved. Always investigate and address underlying issues, such as leaks, improper humidity levels, or structural problems, before performing repairs.
Long-Term Care Tips for Repaired Laminate Flooring
Once you’ve repaired your laminate flooring, adopting proper care practices can extend its life and maintain its appearance.
Regular Inspections
Perform regular checks on your laminate flooring to catch issues early. Look for signs of gaps, cracks, or scratches, especially in high-traffic areas. Early detection makes repairs easier and prevents minor damage from becoming a bigger issue. Set a schedule to inspect your floors at least once every few months, paying attention to problem-prone areas near entrances or kitchens.
Avoiding Abrasive Cleaners
Harsh cleaning products or abrasive tools can strip the protective layer of laminate flooring, making it more vulnerable to damage. Avoid using steel wool, scouring pads, or cleaners with strong chemicals like ammonia. Instead, stick to laminate-safe cleaners and soft microfiber mops or cloths for regular maintenance. Gentle cleaning methods will keep your floors looking new without compromising their durability.
Seasonal Maintenance
Laminate flooring can react to seasonal changes, so adapting your care routine accordingly helps prevent issues. In winter, use mats near entrances to catch snow and moisture before they reach the floor. During summer, keep rooms ventilated and use air conditioning or fans to prevent humidity from causing warping. For year-round protection, consider using a humidifier or dehumidifier to maintain consistent humidity levels between 35–55%.
Advanced Techniques for Seamless Laminate Flooring Repair
Advanced techniques can help you achieve a flawless finish for laminate flooring repair that looks professional. These methods are especially useful for extensive damage or when standard fixes don’t suffice.
Customizing Repair Kits for Perfect Matches
Repair kits are essential for fixing scratches, chips, or cracks, but not all kits will perfectly match your flooring’s color or texture. Customizing your repair kit ensures a seamless result. Mix colors from multiple touch-up markers or fillers to match the tone and grain of your laminate flooring. Always test the color on a hidden area before applying it. For textures, use fine-grain sandpaper to mimic the surface finish after applying fillers or putty.
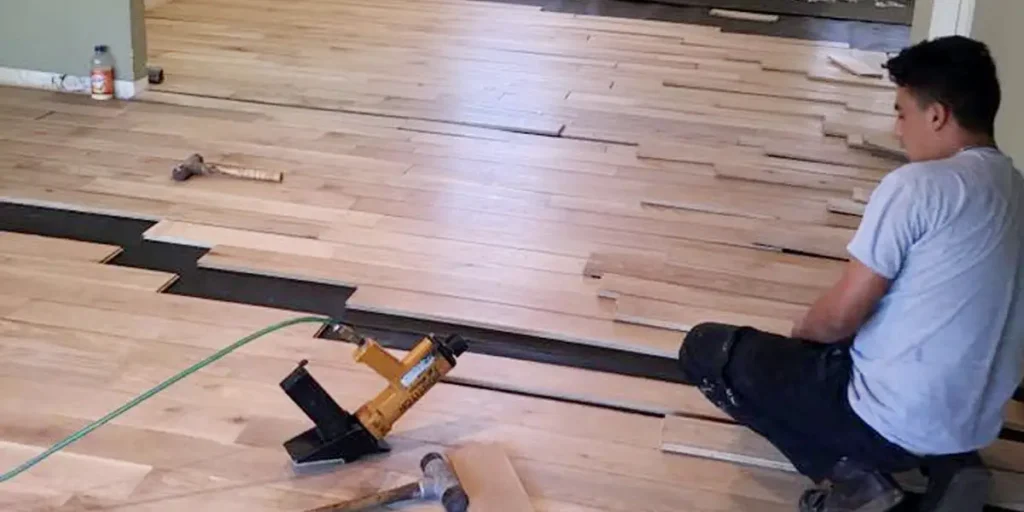
Replacing Damaged Planks Without Disassembling the Floor
Replacing a single damaged plank might seem daunting, especially if you don’t want to disassemble the entire floor. Start by cutting around the damaged plank using a utility knife or circular saw. Carefully remove the plank without disturbing adjacent ones. Prepare a new plank by trimming its locking mechanism and applying adhesive to secure it. Place the replacement plank in position and weigh it down until the adhesive sets. This approach saves time and avoids disrupting surrounding planks.
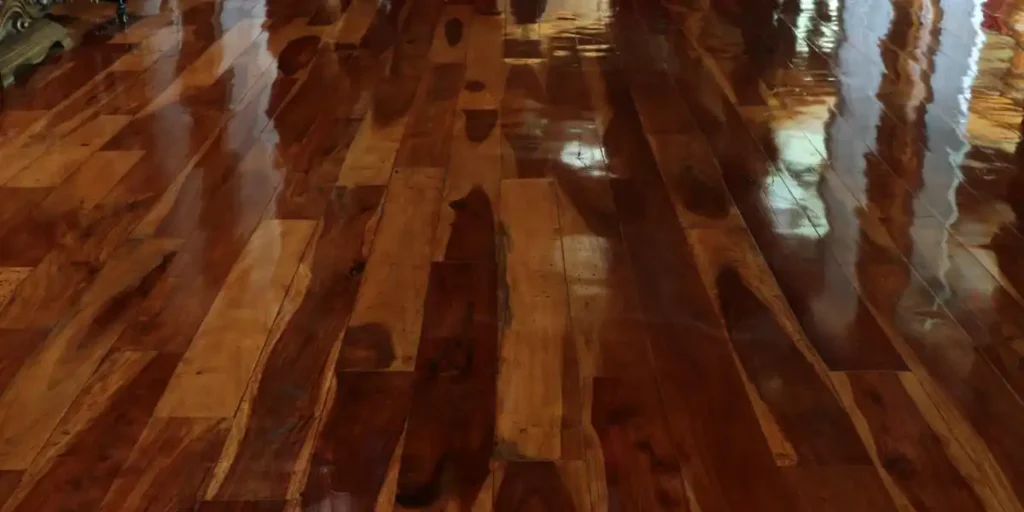
Refinishing Large Damaged Areas
If your laminate flooring has extensive surface damage, refinishing may be the best option. While laminate can’t be sanded and refinished like hardwood, you can use laminate resurfacing kits. These kits typically include a scratch filler, sealant, and a refinishing topcoat. Apply the products evenly across the damaged area to restore the surface. Refinishing is particularly effective for high-traffic areas that show widespread wear.
When to Call a Professional
While many laminate flooring issues can be fixed with DIY methods, some situations require professional help. Knowing when to call an expert can save time and prevent further damage.
Recognizing Complex Repair Scenarios
Complex repairs often involve structural damage, extensive warping, or persistent moisture issues. For example, if multiple planks are buckling or the subfloor is compromised, a professional assessment is essential. Experts have specialized tools and experience to address these problems effectively, ensuring the repair is thorough and long-lasting.
Cost vs. DIY Benefits
Deciding between DIY and professional repair often comes down to cost and time. DIY repairs are more budget-friendly for minor issues like scratches or small cracks, but they can become time-consuming if the damage is widespread. Professional repairs might cost more upfront but can provide long-term savings by addressing root causes and ensuring a high-quality finish. Weigh the scope of the damage against your skills and resources to make the best choice.
Wrapping It Up
Laminate flooring repair doesn’t have to be overwhelming. With the right tools, techniques, and preventive measures, you can keep your floors looking as good as new. From fixing minor scratches to replacing planks and addressing gaps, each step helps extend the life of your flooring. Advanced methods and professional help are always available for complex issues, ensuring your repairs are effective and lasting.
For highly professional Laminate flooring services, get in touch with Cardenas flooring today!
FAQs
Can I repair laminate flooring without replacing planks?
Yes, minor damage like scratches, chips, or gaps can be repaired using touch-up kits, putty, or adhesive without replacing planks. For more severe issues, replacing planks may be necessary.
What tools are best for fixing scratches on laminate?
Touch-up markers, wax crayons, and laminate repair kits are ideal for fixing scratches. For deeper scratches, repair putty and sandpaper can help create a smooth finish.
How do I prevent gaps from recurring?
Ensure proper humidity levels in your home and use floor clamps or adhesive to secure planks during repair. Address temperature fluctuations by maintaining consistent indoor conditions.
Can warped laminate be salvaged, or does it need replacing?
Minor warping can sometimes be fixed by addressing the source of moisture and weighing down the planks. Severe warping typically requires replacing the affected planks.
How often should I check for minor damage on my flooring?
Inspect your laminate flooring every few months, especially in high-traffic or moisture-prone areas, to catch and repair minor damage before it worsens. Regular maintenance helps prolong the life of your floors.