Refinishing hardwood floors is a cost-effective way to restore their beauty and extend their lifespan. Whether your floors are scuffed, scratched, or just dull, learning how to refinish hardwood floors can transform your space without the expense of replacing the flooring entirely.
This beginner’s guide walks you through the entire process, from preparation to finishing, ensuring you achieve a professional-looking result.
Why Refinish Hardwood Floors?
Over time, hardwood floors lose their sheen due to foot traffic, furniture movement, and everyday wear and tear. Refinishing not only revitalizes their appearance but also protects the wood from further damage.
Here’s why refinishing is worth considering:
- Cost-Effective: Refinishing is significantly cheaper than replacing hardwood floors.
- Aesthetic Appeal: Restore the original shine and beauty of your floors.
- Durability: A fresh finish strengthens the wood, making it more resistant to scratches and moisture.
Step-by-Step Guide to Refinish Hardwood Floors
Step 1: Assess Your Floors
Before starting the refinishing process, evaluate the condition of your hardwood floors to determine if refinishing is the best option.
When to Refinish:
- Visible scratches and scuffs.
- Loss of shine or dull appearance.
- Minor water damage or discoloration.
When to Replace:
- Severe warping or buckling.
- Deep gouges that expose the subfloor.
- Extensive water damage.
Knowing the extent of the damage will help you decide whether you need a simple sanding and refinishing or more extensive repairs.
Step 2: Gather Tools and Materials
Refinishing hardwood floors requires specific tools and materials. Here’s a checklist to get you started:
Tools:
- Floor sander (rent from a hardware store)
- Edge sander or hand sander
- Sandpaper (various grits: 36, 60, 100, 120)
- Putty knife
- Paint roller or applicator pad
- Vacuum cleaner
- Microfiber cloths
Materials:
- Wood filler
- Stain (optional, for changing the floor color)
- Polyurethane or hardwood floor finish
- Painter’s tape
- Dust mask and safety goggles
Having all the tools and materials ready will make the refinishing process smoother and more efficient.
Step 3: Prepare the Space
Proper preparation is crucial to achieving a professional finish.
- Clear the Room: Remove all furniture, rugs, and decor from the room.
- Clean Thoroughly: Deep clean the floor to remove dirt, dust, and debris.
- Inspect for Damage: Fill any cracks or holes with wood filler and let it dry.
- Protect Adjacent Areas: Use painter’s tape to cover baseboards, vents, and adjacent surfaces.
Taking these steps ensures a clean workspace and reduces the risk of mistakes during sanding and finishing.
Step 4: Sand the Floors
Sanding is the most labor-intensive part of the process, but it’s essential for removing the old finish and smoothing out imperfections.
- Start with Coarse Grit: Begin with 36-grit sandpaper to remove the old finish. Use a drum sander for large areas and an edge sander for corners and edges.
- Switch to Medium Grit: Move to 60-grit sandpaper to eliminate scratches left by the coarse grit.
- Finish with Fine Grit: Use 100-120 grit sandpaper to achieve a smooth surface.
- Vacuum Thoroughly: Clean up all dust and debris with a vacuum and wipe down the floor with a microfiber cloth.
Pro Tip: Sand in the direction of the wood grain to avoid cross-grain scratches.
Step 5: Apply Stain (Optional)
If you want to change the color of your hardwood floors, now is the time to apply a stain.
- Choose the Right Stain: Select a stain color that complements your home’s decor.
- Test on a Small Area: Apply the stain to a hidden spot to ensure it meets your expectations.
- Apply Evenly: Use a clean cloth or applicator pad to spread the stain evenly across the floor.
- Wipe Excess Stain: Remove any excess stain with a cloth to avoid uneven coloration.
- Let it Dry: Allow the stain to dry completely, following the manufacturer’s instructions.
Applying stain adds character to your floors and enhances the wood’s natural beauty.
Step 6: Apply the Finish
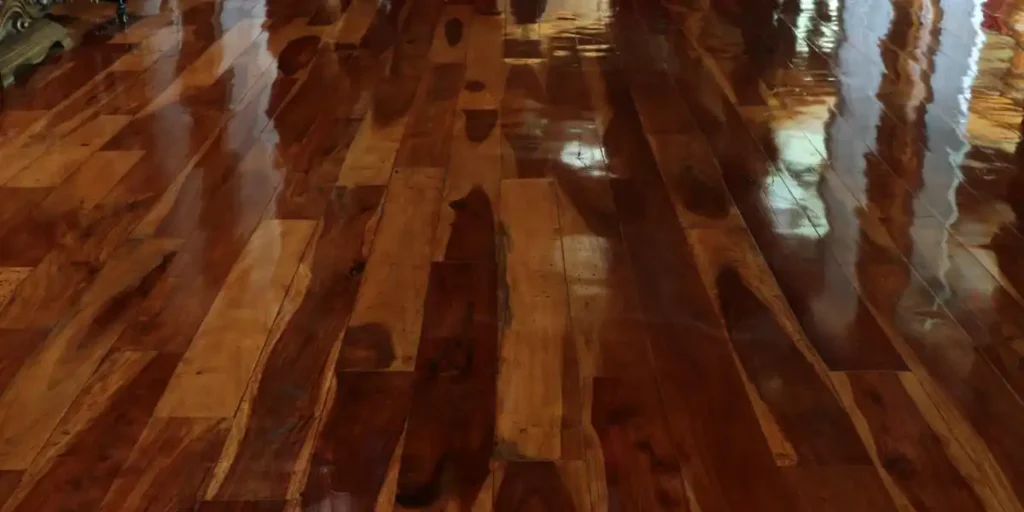
The finish is the protective layer that seals the wood and gives it shine. There are two main types of finishes: oil-based and water-based. Oil-based finishes are more durable but take longer to dry, while water-based finishes dry quickly and have lower VOCs.
- Choose the Finish: Decide between a matte, satin, or glossy finish based on your preference.
- Stir, Don’t Shake: Stir the polyurethane to avoid bubbles in the finish.
- Apply the First Coat: Use a paint roller or applicator pad to spread the finish evenly. Start at the farthest corner and work toward the exit.
- Let it Dry: Allow the first coat to dry for the recommended time (usually 4-6 hours for water-based and 24 hours for oil-based finishes).
- Sand Lightly: Lightly sand the dried finish with 220-grit sandpaper to remove imperfections.
- Apply Additional Coats: Repeat the process for 2-3 coats, ensuring a durable and long-lasting finish.
Pro Tip: Ventilate the room well during the finishing process to minimize exposure to fumes.
Step 7: Let the Floors Cure
After applying the final coat, give your floors ample time to cure.
- Water-Based Finish: Wait 24-48 hours before placing furniture and rugs.
- Oil-Based Finish: Allow 48-72 hours before moving furniture back into the room.
Avoid heavy traffic during the curing period to prevent damage to the fresh finish.
Maintenance Tips for Refinished Hardwood Floors
To keep your newly refinished floors looking great, follow these maintenance tips:
- Sweep Regularly: Use a soft-bristled broom to remove dirt and debris.
- Use Rugs: Place rugs in high-traffic areas to protect the finish.
- Avoid Harsh Cleaners: Use pH-neutral hardwood floor cleaners to maintain the shine.
- Trim Pet Nails: Prevent scratches by keeping your pets’ nails trimmed.
Proper care will ensure your hardwood floors remain beautiful for years to come.
Final Thoughts
Learning how to refinish hardwood floors is an empowering and rewarding process. With proper preparation, tools, and techniques, you can restore your floors to their original beauty without breaking the bank. Follow this beginner’s guide to tackle the project confidently, ensuring a professional finish that enhances your home’s value and aesthetic appeal.
Transform your hardwood floors today with professional refinishing services by Cardenas Flooring. Contact us now for a free consultation and expert solutions!
FAQs
Can I refinish hardwood floors myself?
Yes, you can refinish hardwood floors yourself if you have the right tools and follow proper steps. It’s a manageable DIY project for homeowners willing to invest time and effort. However, for large areas or significant damage, hiring a professional might deliver better results.
How long does it take to refinish hardwood floors?
Refinishing hardwood floors typically takes 3-5 days. This includes sanding, staining (if desired), and applying multiple coats of finish. Allow extra time for drying and curing, especially for oil-based finishes, which take longer than water-based alternatives.
What’s the cost of refinishing hardwood floors?
DIY refinishing costs approximately $1-3 per square foot, making it a budget-friendly option. Professional refinishing, which includes labor and materials, costs $4-8 per square foot. The total cost depends on the size of the area and the chosen materials.
How often should I refinish my hardwood floors?
Hardwood floors generally need refinishing every 7-10 years, depending on the level of wear and tear. High-traffic areas may require more frequent refinishing, while lightly used spaces can go longer before needing attention.
Can engineered hardwood floors be refinished?
Yes, engineered hardwood floors can be refinished, but only if they have a thick wear layer. Thin layers may not withstand sanding. Consult a professional to assess whether your engineered flooring is suitable for refinishing.


