Water-damaged hardwood floors can turn a stunning feature of your home into a disheartening eyesore. Warping, buckling, and discoloration are common signs, and ignoring the issue can lead to further damage, including structural problems.
But don’t despair this guide is here to help you navigate solutions, whether it’s a simple DIY repair or a more intensive professional intervention. With the right approach, your floors can return to their former glory, shining as a centerpiece in your home.
Assessing the Damage: Understanding the Severity
Before diving into solutions, understanding the extent of water damage is crucial. Assessing the severity will guide you in choosing the appropriate fix and prevent unnecessary costs.
1. Minor Damage:
- Indicators: Surface moisture, slight discoloration, or mild warping.
- Solution: Often treatable with quick drying and minor touch-ups.
2. Moderate Damage:
- Indicators: Cupping (edges rising higher than the center) or crowning (center higher than edges).
- Solution: Requires sanding and refinishing after thorough drying.
3. Severe Damage:
- Indicators: Extreme warping, visible rot, or mold growth.
- Solution: Replacement of affected planks or entire sections may be necessary.
DIY Methods: How to Fix Water-Damaged Hardwood Floors
Water damage can be distressing, but minor issues can often be tackled with effective DIY techniques. Here’s a step-by-step guide to fixing water-damaged hardwood floors.
Step 1: Dry Out the Affected Area
Drying is the foundation of any successful repair. Without thoroughly drying the area, subsequent steps may not work effectively.
- Dehumidifiers and Fans: Place high-powered fans and dehumidifiers around the damaged area to extract moisture. Position fans to circulate air and direct airflow across the surface.
- Ventilation: Open windows to promote cross-ventilation, but be cautious of outdoor humidity, as excessive moisture can prolong the drying process.
- Monitor Progress: Use a moisture meter to ensure the hardwood’s moisture level returns to its normal range (typically 6–12%). This process may take several days or even weeks, depending on the extent of the damage.
Step 2: Flattening Minor Warping
For boards that have begun to warp but aren’t severely damaged, you can restore their shape with these steps:
- Dampen the Underside: Gently dampen the underside of the warped plank with a cloth to make the wood pliable. Avoid over-saturating, as this can worsen the problem.
- Apply Clamps: Slowly and evenly apply pressure to the warped area using clamps. Place a flat piece of wood between the clamp and the surface to distribute pressure and prevent damage.
- Dry While Clamped: Allow the board to dry completely while clamped in place. This may take 24–48 hours.
Step 3: Sanding and Refinishing
Once the floor is completely dry:
- Sanding: Use fine-grit sandpaper to even out minor warping and remove discoloration.
- Staining: Match a wood stain to the existing floor and carefully apply it to the repaired area.
- Sealant Application: Finish with a protective sealant to restore the floor’s durability and sheen.
Professional Repairs for Advanced Issues
When the damage is severe, DIY methods may not suffice. Professional intervention is crucial in these cases.
Replacing Damaged Boards
For irreparably warped, rotted, or broken planks:
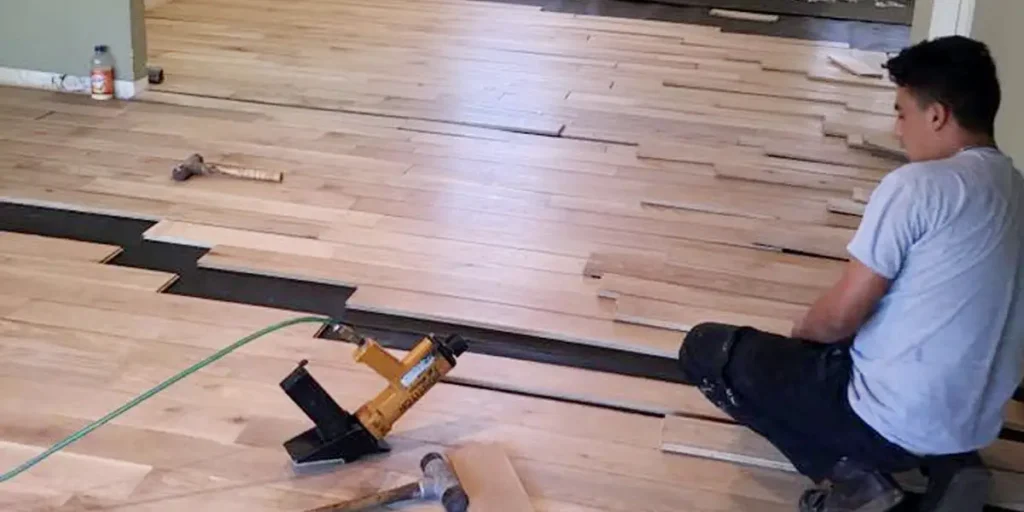
- Removal: Carefully pry out damaged boards using specialized tools to avoid damaging surrounding planks.
- Matching Materials: Select new boards that match the wood type, color, and finish of your existing floor.
- Installation: Align and install new boards, ensuring they are properly secured and seamlessly integrated.
Addressing Mold Growth
Mold growth indicates prolonged moisture exposure and must be handled promptly:
- Professional Mold Remediation: Enlist experts to safely eliminate mold and prevent health hazards.
- Board Replacement: Replace all affected boards to stop the spread and restore structural integrity.
By following these steps, you can effectively address water damage and restore the beauty and functionality of your hardwood floors.
Preventing Future Water Damage: Proactive Measures
1. Fix Leaks Immediately
Even minor leaks from plumbing or appliances can cause significant damage over time. Regular inspections and prompt repairs are essential.
2. Use Rugs and Mats
Place waterproof mats in high-risk areas such as entryways, kitchens, and bathrooms to catch spills and prevent moisture from seeping into the wood.
3. Regular Maintenance
- Clean spills immediately with a dry or slightly damp cloth.
- Reapply protective sealants every few years to maintain the floor’s resistance to water.
Final Thoughts
Dealing with water-damaged hardwood floors can be overwhelming, but with the right steps, you can restore their beauty and functionality.
Assess the damage carefully, act quickly to dry out the area, and choose the appropriate repair method based on severity.
Remember, proactive measures like regular maintenance and addressing leaks promptly are your best defense against future issues. Whether you tackle the repairs yourself or enlist professional help, your hardwood floors can shine again, adding elegance and value to your home for years to come.
Say goodbye to dull, damaged hardwood floors with Cardenas Flooring’s expert services. We’ll restore their shine and extend their lifespan. Contact us today to schedule an appointment and experience the difference of professional flooring care!
FAQs
How do I know if water-damaged hardwood floors need to be replaced or repaired?
The decision depends on the severity of the damage. If the wood has minor warping, discoloration, or surface-level issues, sanding and refinishing might be sufficient. However, if the boards show signs of significant warping, mold, rot, or structural instability, replacement is necessary. Assess the damage carefully, and if you’re unsure, consult a flooring professional to determine the best course of action.
Can I fix water-damaged hardwood floors without professional help?
Minor water damage, such as surface-level discoloration or slight warping, can often be repaired with DIY methods like drying, sanding, and refinishing. However, more severe damage, such as mold, deep warping, or extensive rotting, typically requires professional repair or replacement to ensure safety and durability. Attempting DIY fixes on serious damage may lead to further issues.
What is the best way to dry water-damaged hardwood floors?
Use a combination of dehumidifiers, high-powered fans, and proper ventilation to extract moisture. Open windows if the weather permits or use an air conditioner to control humidity. Avoid using direct heat sources like hairdryers, as uneven drying can cause additional warping. The drying process may take several days or even weeks, depending on the extent of the water damage.
Is mold growth always a concern with water-damaged hardwood floors?
Not always, but it can become a problem if the water is left untreated for an extended period or if humidity levels remain high. Mold thrives in damp environments, so drying the floors thoroughly and disinfecting the area is crucial. If mold is already present, professional remediation is strongly recommended to ensure it doesn’t spread or compromise the structure of your floors.
How can I protect my hardwood floors from water damage in the future?
To prevent water damage, address leaks or spills promptly, and use area rugs or waterproof mats in high-risk areas like kitchens and entryways. Regularly inspect your floors for signs of moisture and reapply a protective sealant every few years. Additionally, maintain stable indoor humidity levels using a dehumidifier or HVAC system to minimize the risk of warping or cupping.


