Flooring Advice

cost-to-refinish-hardwood-floors
Flooring Advice

Refinishing Hardwood Floors: Cost Breakdown for 2025 – Your Complete Guide

Hardwood floors are a timeless feature in any home, but wear and tear can dull their beauty over time. Refinishing restores their original luster, making your space look refreshed and well-maintained. If you’re wondering, how much does it cost to refinish hardwood floors, this guide explores all aspects of refinishing, including costs, influencing factors, and whether you should DIY or hire professionals. What Does Refinishing Hardwood Floors Involve? Refinishing hardwood floors involves a multi-step process to restore their beauty and durability. Understanding each phase will help you appreciate the effort and expenses involved. Sanding: This step removes the existing finish and any surface imperfections. A professional uses a drum sander for uniform results. Sanding also prepares the wood for stain and sealant absorption. Repairs: If there are deep scratches, gaps, or damaged planks, this is the time to address them. Replacing boards or filling gaps ensures a smooth, cohesive look. Staining: Stain gives the floor its desired color. Whether you want a natural tone or a bold statement, this step transforms the wood’s appearance. Sealing: Applying a polyurethane finish (oil-based or water-based) protects the wood from wear, moisture, and scratches. Multiple coats are often required, with drying times in between. Buffing: After the finish is applied, the floor is buffed to achieve a smooth, polished look. By understanding these steps, you can better evaluate how much does it cost to refinish hardwood floors and decide whether the investment aligns with your budget. Factors Influencing the Cost of Refinishing Hardwood Floors When calculating how much does it cost to refinish hardwood floors, these factors play a significant role: 1. Floor Area The size of your space directly impacts the overall cost. Larger areas require more materials and labor. For instance, refinishing a 1,200 sq ft space costs more than a smaller 500 sq ft area. Professionals typically charge per square foot, and rates vary depending on regional pricing standards. Pro Tip: Measure the area accurately to get precise estimates from contractors. 2. Condition of the Floor The floor’s condition affects both cost and complexity. Floors with minor scratches are less expensive to refinish than those with extensive damage. Light Damage: Superficial scratches and wear require basic sanding and refinishing. Severe Damage: Gouges, water damage, or loose boards involve higher repair costs. In severe cases, replacing certain planks may be necessary. 3. Type of Wood Different wood species behave uniquely during refinishing. Some woods are easier to sand, while others require specialized care. Hardwoods like Oak and Maple: These woods are common in homes and straightforward to refinish. Exotic Woods like Mahogany: These are costlier due to their density and specific staining requirements. 4. Labor Costs Hiring professionals is a significant part of the total cost. Contractors charge based on expertise, tools, and location. High-skilled labor ensures a flawless finish, which justifies the expense. DIY Alternative: While DIY refinishing can save labor costs, the risk of mistakes could lead to additional expenses for repairs or rework. 5. Finish Type Choosing between oil-based or water-based polyurethane impacts cost: Oil-Based Finish: Costs less initially but takes longer to dry and yellows over time. Water-Based Finish: Dries quickly and retains a clear, modern appearance, though slightly pricier. 6. Location Geography significantly affects how much does it cost to refinish hardwood floors. Urban areas generally have higher labor costs than rural regions. Additionally, access to materials and competition among contractors can influence pricing. Expense Category Description Cost Estimate Sanding and Buffing Removing the old finish and preparing the surface with specialised equipment. $1.50–$3.00 per sq ft Repairs and Patchwork Fixing gouges, scratches, or loose planks for a seamless look. $100–$500 (depending on severity) Applying Stain (Optional) Add color to enhance or match decor. $0.50–$1.00 per sq ft Finish Application Applying polyurethane for protection and improved appearance. $1.00–$2.00 per sq ft Cleanup and Waste Disposal Ensuring no residue remains after refinishing. $50–$150 Total Estimated Cost (1,000 sq ft) Varies based on labor, materials, and location. $3,000–$8,000 DIY vs. Professional Refinishing: Which Option is Best? DIY Refinishing For homeowners who love tackling projects, DIY refinishing offers cost savings but comes with challenges: Cost: $1–$3 per sq ft for equipment and materials. Pros: Lower costs, control over the process. Cons: Time-consuming, risk of mistakes. Professional Refinishing Hiring experts ensures a professional finish and fewer headaches: Cost: $3–$8 per sq ft. Pros: Faster, better results, includes repairs. Cons: Higher upfront cost. Final Thoughts Refinishing hardwood floors is a cost-effective way to restore their beauty and durability, adding value to your home. By understanding the factors influencing cost and weighing DIY vs. professional options, you can make an informed decision. Ready to transform your floors? Whether you’re looking to save or splurge, refinishing is a worthwhile investment for timeless, elegant flooring. Ready to bring your hardwood floors back to life? Contact Cardenas Flooring today for expert refinishing services and a free quote! FAQs (Frequently Asked Questions) 1. Is it cheaper to refinish hardwood floors or replace them?  Refinishing is generally much cheaper than replacing hardwood floors. 2. How long does it take to refinish 1000 square feet of hardwood floors?  It typically takes 3–5 days to refinish 1,000 square feet of hardwood flooring. 3. How expensive is it to refinish hardwood floors? Refinishing hardwood floors costs between $3 to $8 per square foot on average. 4. Is it worth refinishing old hardwood floors?  Yes, refinishing restores their beauty, extends lifespan, and increases home value. 5. How many times can hardwood floors be refinished? Most hardwood floors can be refinished 4–6 times, depending on the wood thickness. 6. Why is floor sanding so expensive? High labor costs, specialised equipment, and material expenses contribute to the cost. 7. What hardwood floors cannot be refinished? Engineered hardwood with a thin veneer and laminate flooring cannot be refinished. 8. Is hardwood more expensive than vinyl? Yes, hardwood is more expensive than vinyl but lasts longer and adds value.
cost-to-install-hardwood-floors-1200-sq-ft
Flooring Advice

How Much Does It Cost to Install Hardwood Floors for 1,200 sq ft?

Installing hardwood floors in a 1,200 sq ft area can transform your space, adding elegance, durability, and value. But, if you’re asking, “How much does it cost to install hardwood floors for 1,200 sq ft?” you’ll quickly realize there are multiple factors influencing the cost. This comprehensive guide will explore every detail, breaking down costs, options, and considerations to help you make an informed decision. Understanding Hardwood Flooring Costs Before diving into numbers, it’s crucial to understand what affects the cost of hardwood flooring installation. 1. Material Costs The type of wood you choose significantly impacts the price: Solid Hardwood: This is crafted from a single piece of wood, typically more expensive but extremely durable. Engineered Hardwood: Made with a real wood veneer and layers of plywood, engineered hardwood is more affordable and moisture-resistant. Within these types, wood species also affect costs: Domestic Woods: Oak, maple, and hickory cost between $3–$10 per sq ft. Exotic Woods: Teak, mahogany, and Brazilian cherry range from $8–$15 per sq ft. 2. Installation Method Different installation methods influence labor costs: Nail-Down: Ideal for solid hardwood, costing $4–$8 per sq ft. Glue-Down: Often used for engineered hardwood, requiring adhesive, costing $5–$10 per sq ft. Floating Floors: Easier to install and more affordable, averaging $3–$7 per sq ft. 3. Additional Expenses Subfloor Preparation: Repair or leveling adds $1–$3 per sq ft. Old Flooring Removal: Expect $1–$2 per sq ft for removal and disposal. Staining and Finishing: If you choose unfinished wood, staining and sealing add $2–$5 per sq ft. Cost Breakdown: How Much Does It Cost to Install Hardwood Floors for 1,200 sq ft? Category Cost Range Material Costs   Engineered Hardwood $3,600 – $12,000 Solid Hardwood $6,000 – $18,000 Labor Costs   Installation (Per Sq Ft) $4 – $8 Low-End Estimate $4,800 High-End Estimate $9,600 Additional Costs   Subfloor Preparation $1,200 – $3,600 Old Flooring Removal $1,200 – $2,400 Staining & Finishing $2,400 – $6,000 (if required) Total Cost   Low-End Estimate $9,600 – $13,200 Mid-Range Estimate $15,000 – $18,000 High-End Estimate $19,200 – $28,800 If you’re planning a home upgrade, understanding the hardwood floor installation cost is essential. The cost of hardwood floors varies based on the type of wood you choose. Engineered hardwood offers a more budget-friendly option, while solid hardwood tends to be pricier. Labor costs can also impact your total hardwood floor cost, with professional installation ranging between $4 to $8 per square foot. Additionally, expenses like subfloor preparation, old flooring removal, and optional staining and finishing should be considered in your budget. Factors Influencing Your Final Cost Several variables can adjust these estimates: Wood Grade Clear Grade: Flawless, premium wood at a higher cost. Select Grade: Fewer imperfections, offering good value. Rustic Grade: Natural, knotty appearance, and the most affordable. Room Layout Rooms with many corners, odd angles, or obstacles like fireplaces require more labor, increasing installation costs. Moisture Control If your home is in a humid region, additional moisture barriers or treatments might be required, adding to the cost. Underlayment For soundproofing or added comfort, underlayment materials cost $0.50–$1 per sq ft. DIY vs. Professional Installation DIY Installation If you’re handy, installing hardwood floors yourself can save $4–$8 per sq ft in labor. However, you’ll need specialized tools like a flooring nailer, saws, and adhesive applicators, which could cost $300–$1,000 upfront. Mistakes can lead to uneven floors or gaps, requiring costly repairs. Professional Installation Hiring experts ensures precision and reduces the risk of damage. Professionals also typically offer warranties on their work, adding peace of mind. Tips to Save on Hardwood Floor Installation Choose Engineered Hardwood: Offers the same aesthetic appeal at a lower cost. Opt for Pre-Finished Wood: Saves time and money on staining and sealing. Do Prep Work Yourself: Remove old flooring and furniture to cut labor costs. Shop Sales: Look for discounts or bulk deals on materials. Get Multiple Quotes: Compare prices from several contractors to ensure a competitive rate. Is Hardwood Flooring Worth the Investment? Hardwood flooring is not just an expense; it’s an investment. Homes with hardwood floors sell faster and for more money. Additionally, hardwood lasts for decades with proper care, often outliving other flooring options like carpet or laminate. Final Thoughts When considering how much does it cost to install hardwood floors for 1,200 sq ft, remember that it’s not just about upfront expenses but also long-term value. By choosing the right materials, installation method, and professionals, you’ll enjoy a stunning, durable floor that elevates your home’s aesthetic and resale value. Transform your home with stunning hardwood floors! Contact Cardenas Flooring today for expert installation, affordable pricing, and a free consultation. Let’s bring your flooring vision to life! FAQs 1. How much does it cost to install hardwood floors for 1,200 sq ft? The cost ranges from $9,600 to $28,800 depending on factors like the wood type, labor, and additional expenses such as subfloor preparation. Premium wood and complex installations increase costs, while DIY options can save money but require skill. 2. Can I install hardwood floors myself? Yes, DIY installation is possible with proper tools and expertise. It can save $4–$8 per sq ft, but errors in measurement or technique may lead to uneven floors or costly repairs. Professional installation is recommended for intricate projects or if you lack experience. 3. How long does it take to install hardwood floors for 1,200 sq ft? Professional installation typically takes 4–7 days. This includes tasks like subfloor preparation, laying the planks, sanding, and finishing. Additional time may be needed for complex designs, repairs, or acclimating the wood to the environment. 3. What is the lifespan of hardwood flooring? Hardwood floors can last 50–100 years with proper care. Regular cleaning, refinishing, and protection from moisture ensure their longevity. Investing in durable species like oak or hickory can extend their lifespan, making hardwood a long-term flooring solution. 4. Are hardwood floors pet-friendly? Yes, hardwood floors can be pet-friendly when using durable woods like oak or hickory. Protect floors by trimming your pet’s nails and using rugs in high-traffic

hardwood-tree-species-for-structural-timbers-and-flooring
Flooring Advice

Discover the Best Tree Species for Hardwood Flooring: A Guide

So, you’re considering an upgrade to beautiful hardwood floors? That’s an excellent decision! Hardwood flooring offers timeless elegance, durability, and value. However, selecting the right species for your floors can feel overwhelming. With so many options available, the question arises: what tree species are best for hardwood flooring, and which one suits your needs? This comprehensive guide explores the most popular species used for hardwood flooring, highlighting their characteristics, benefits, and considerations. Understanding Hardwood: What Tree Species is Used for Hardwood Flooring? Hardwoods come from deciduous trees that shed their leaves annually. They are generally denser and more durable than softwoods, making them ideal for flooring, furniture, and structural timbers. However, “hardwood” doesn’t always equate to hardness; it’s more about the tree type. For example, balsa is a hardwood but is very soft, while yew, a softwood, is harder than some hardwoods. When it comes to flooring, the focus is on durability, grain patterns, and the ability to withstand daily wear. Hardwoods like oak, maple, and walnut are preferred for their balance of strength, beauty, and longevity. Popular Hardwood Flooring Tree Species When choosing hardwood flooring, the tree species plays a vital role in determining durability, aesthetics, and maintenance requirements. Here’s a deeper dive into the most popular hardwood flooring options: 1. Oak: The Timeless Favorite Oak stands as a benchmark for hardwood flooring, celebrated for its remarkable durability, attractive grain, and versatility to fit various design styles. It comes in two primary types: Red Oak: Known for its warm, reddish undertones and prominent grain patterns, red oak adds a cozy charm to traditional or rustic interiors. It’s slightly softer than white oak but still robust enough for most homes. White Oak: A modern favorite, white oak offers subtle grain patterns and a cooler, darker hue. Its natural water resistance makes it a better choice for areas prone to occasional spills or humidity, such as kitchens and entryways. 2. Maple: Sleek and Durable Maple is the go-to choice for homeowners seeking a clean, contemporary aesthetic. Its pale color and minimal grain create a sleek, modern vibe. Hard Maple: With superior resistance to dents and scratches, hard maple is ideal for high-traffic areas such as living rooms and hallways. Soft Maple: While more budget-friendly, soft maple lacks the durability of its harder counterpart, making it suitable for less demanding spaces. 3. Cherry: Warm and Inviting Cherry hardwood is prized for its rich, reddish-brown tones that deepen with age, adding character and warmth to any room. Pros: Its natural elegance makes cherry an excellent choice for formal living spaces or bedrooms. Cons: As a softer hardwood, cherry is more prone to dents and scratches, limiting its suitability for high-traffic or active households. 4. Walnut: Luxury and Sophistication Walnut’s deep brown tones and straight, fine grain make it a standout option for luxury interiors. Pros: It offers excellent stability and resistance to warping, ensuring long-lasting beauty. Cons: Walnut’s premium appeal comes at a higher cost, making it less budget-friendly. 5. Hickory: The Powerhouse Hickory is unmatched in strength, making it an ideal choice for busy homes and commercial spaces. Pros: Its exceptional hardness withstands heavy foot traffic and frequent use. Cons: Hickory’s distinctive grain patterns can be polarizing, requiring thoughtful consideration for design harmony. Factors to Consider When Choosing Hardwood Flooring Selecting the right species requires balancing aesthetics, functionality, and environmental factors: Durability: For areas with heavy use, opt for harder species like hickory, oak, or hard maple. Budget: Domestic species like oak and maple are affordable, while exotic woods like teak and mahogany come with a premium price tag. Style: Light woods like maple complement modern designs, while darker species such as walnut add sophistication to traditional settings. Climate: High humidity levels call for more stable options like engineered hardwood or naturally moisture-resistant species such as white oak. Maintenance: Some woods, like cherry and walnut, require more frequent care to maintain their finish and prevent wear. Final Thoughts Choosing the right tree species for your hardwood flooring is a blend of practicality and personal preference. Whether you prioritize durability, aesthetics, or cost, understanding the unique characteristics of each wood will guide you toward the best decision for your home. Oak offers classic appeal, maple provides sleek durability, and walnut brings a touch of luxury, while hickory stands out for its unmatched toughness. By considering your lifestyle, climate, and design preferences, you can confidently select a hardwood species that combines beauty, strength, and longevity. Investing in the right hardwood floors ensures a timeless addition to your home that you’ll cherish for decades. Need help planning your hardwood flooring project? Reach out to Cardenas Flooring for expert guidance and a seamless installation experience. FAQs Which hardwood species is the most durable for flooring? Hickory is considered the most durable domestic hardwood due to its exceptional hardness and resistance to dents and scratches. White oak and hard maple are also highly durable, making them excellent choices for high-traffic areas or homes with pets. Exotic species like Brazilian walnut offer even greater hardness but are typically more expensive. When choosing a species, consider both durability and maintenance needs to ensure your floors stand up to daily wear and tear. What is the most affordable hardwood species for flooring? Red oak is one of the most affordable and widely available hardwoods, offering excellent durability and an attractive grain pattern. Maple is another budget-friendly option that provides a modern look. For tighter budgets, engineered hardwood floors featuring a thinner veneer of oak or maple can provide the aesthetic of solid hardwood at a lower cost. Always compare prices and installation costs to stay within budget. Are exotic hardwoods worth the cost? Exotic hardwoods, such as Brazilian cherry and teak, offer unique aesthetics, exceptional durability, and increased resistance to moisture and pests. While their initial cost is higher, they are often worth the investment for high-end homes or spaces where long-term durability is a priority. However, they may require more specialized maintenance and are less environmentally friendly due to their sourcing. Which

best-way-to-clean-hardwood-floors
Flooring Advice

The Best Way to Clean Hardwood Floors for a Lasting Shine

Are your hardwood floors looking dull and lackluster? Does the thought of cleaning them feel overwhelming? Many homeowners struggle to maintain the brilliance of their hardwood floors. Finding the best way to clean hardwood floors can seem complicated, but it doesn’t have to be. This expert guide will show you effective methods and techniques to achieve a lasting shine, ensuring your floors remain the centerpiece of your home. The Ultimate Guide to Cleaning Hardwood Floors Maintaining the elegance of hardwood floors goes beyond an occasional sweep. To answer “What is the best way to clean hardwood floors?” we need a combination of consistent care, the right cleaning techniques, and protective measures. Let’s explore this step-by-step. Daily Maintenance: Keep Dirt at Bay Daily maintenance is essential to preserve the beauty and longevity of your hardwood floors. By incorporating a few simple habits, you can significantly reduce the risk of scratches and the buildup of grime that dulls their natural shine. Sweep or Vacuum Daily Dirt and debris act like sandpaper underfoot, gradually wearing down the protective finish of your hardwood floors. To prevent this, sweep your floors daily with a soft-bristled broom or use a vacuum equipped with a hardwood floor attachment. Avoid vacuums with beater bars as these can scuff and scratch the surface, causing long-term damage. Quick Spot Cleaning Accidents happen, and spills are inevitable. Address them immediately to prevent staining or water damage. Use a damp, lint-free cloth to blot the spill, avoiding excessive water that can seep into the wood and cause warping. For sticky spots, gently wipe the area with a cloth dampened in a diluted hardwood floor cleaner. Pro Tip: Place mats or rugs near entryways to trap dirt before it gets a chance to settle on your hardwood floors. This simple preventative measure can save you time and effort in your daily cleaning routine. Weekly Cleaning: A Deeper Clean While daily maintenance keeps surface dirt at bay, weekly cleaning ensures your hardwood floors remain pristine. Use a Damp Mop Once a week, clean your floors with a damp microfiber mop and a pH-neutral hardwood floor cleaner. Mix warm water with the cleaner and wring the mop thoroughly to avoid excess moisture, which can damage the wood. Always clean in the direction of the wood grain for the best results. Buff for Shine After mopping, dry the floor immediately using a soft microfiber cloth. This step enhances the shine and prevents water spots from forming, leaving your floors looking flawless. Monthly Deep Cleaning: Tackle Tough Spots Deep cleaning once a month helps to address stubborn stains and built-up grime. Specialized Cleaners For heavily soiled areas, opt for a high-quality hardwood floor cleaner. Follow the manufacturer’s instructions for application to avoid overuse, which can leave a residue.  Address Stains Treat scuff marks with a soft eraser or a vinegar-water solution (1:10 ratio). For sticky spills, gently scrub the area with a microfiber cloth and your hardwood cleaner. Always test any new solution on a hidden spot to ensure compatibility with your floor’s finish. Preventing Damage: Protecting the Shine The best way to clean hardwood floors also involves proactive measures to minimize future damage: Use Rugs and Mats: Place them in high-traffic areas and near entryways to trap dirt before it reaches your floors. Trim Pet Nails: Regular grooming minimizes scratches caused by pets. Furniture Pads: Attach felt pads under furniture legs to prevent dents and scrapes. Control Humidity: Maintain indoor humidity levels between 40%-60% to prevent warping or cupping. Final Thoughts Achieving a lasting shine on your hardwood floors isn’t just about cleaning—it’s about consistent care and thoughtful prevention. From daily sweeping to monthly deep cleaning, following these tips will ensure your floors stay radiant for years to come. For professional advice and services, trust Cardenas Flooring to keep your hardwood floors in pristine condition Contact us today. Whether you need expert cleaning solutions or maintenance tips, we’re here to help. Reach out today for floors that truly sparkle! FAQs How often should I clean my hardwood floors? Cleaning frequency depends on foot traffic and the presence of pets or children. For most households, sweeping or vacuuming daily prevents dirt buildup. Weekly damp mopping with a hardwood-specific cleaner is recommended to maintain shine, and monthly deep cleaning helps tackle stubborn dirt and stains. If you have pets or a busy household, consider vacuuming high-traffic areas more frequently to avoid scratches caused by dirt and debris. Can I use vinegar to clean hardwood floors? Diluted vinegar (1:10 with water) can be used for occasional cleaning, but it’s not ideal for regular use. While it effectively removes dirt, its acidity can dull the protective finish over time. Always wring out mops thoroughly to prevent moisture damage. For safer results, use pH-neutral hardwood floor cleaners specifically formulated to maintain the finish and longevity of your floors. What’s the best way to remove scratches from hardwood floors? For light scratches, use a wood floor polish or scratch repair marker. Deeper scratches may require wood filler matched to the floor’s color, followed by sanding and refinishing. Prevent scratches by using furniture pads, regular sweeping, and trimming pet nails. If damage is extensive, consult a professional for refinishing services. Are steam mops safe for hardwood floors? Steam mops are generally not recommended for hardwood floors unless explicitly designed for them. Excessive heat and moisture can damage the wood, causing warping or peeling of the finish. Instead, use a damp microfiber mop with a hardwood floor cleaner. This approach effectively cleans without introducing excess water or heat, keeping your floors in pristine condition. How do I maintain hardwood floors in high-traffic areas? Place rugs or runners in high-traffic areas like hallways and entryways to protect your floors. Use doormats to trap dirt before it enters your home. Clean these areas daily to remove abrasive debris. Additionally, use furniture pads and avoid wearing high heels to minimize wear and tear. Regular polishing and periodic refinishing help maintain their beauty and durability over time.

best-vacuum-for-hardwood-floors
Flooring Advice

What is the Best Vacuum for Hardwood Floors?

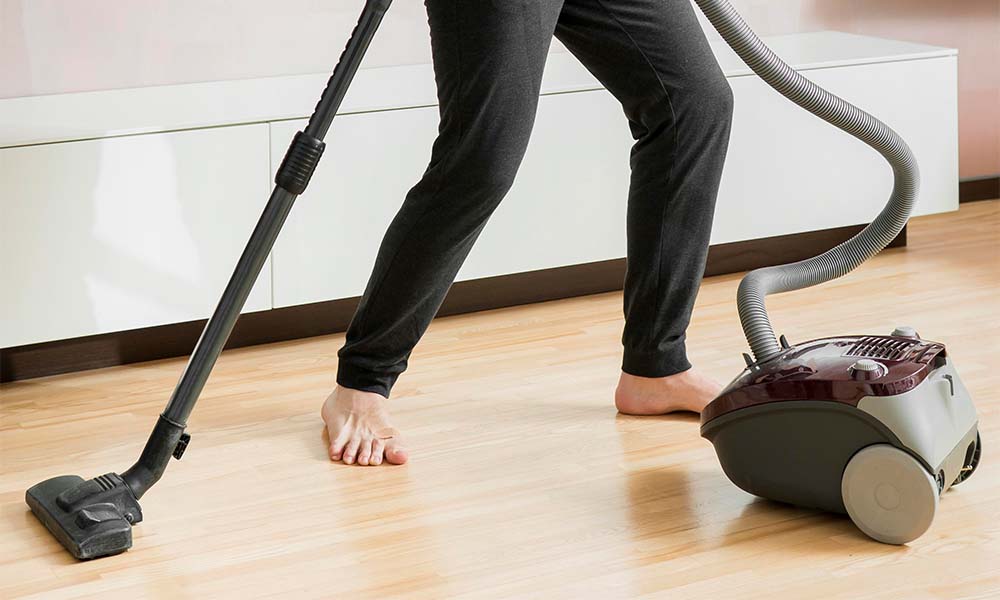
Choosing the best vacuum for hardwood floors can feel overwhelming with so many options on the market. The ideal vacuum should combine strong cleaning performance with features that protect the delicate surface of hardwood floors. Here’s what to look for when selecting the perfect vacuum to maintain the beauty and longevity of your hardwood flooring. Suction Power: Clean Without Damage Effective cleaning starts with powerful suction. Hardwood floors require a vacuum with enough suction to remove dirt, dust, and debris without relying on a rotating brush, which can scratch the surface. Vacuums with adjustable suction settings are excellent for transitioning between different flooring types, ensuring optimal cleaning without unnecessary wear on your hardwood. Soft Brush Rolls: Protecting Your Floor’s Finish A brush roll designed for hardwood is a game-changer. Unlike traditional vacuum rollers, which often have stiff bristles, soft-bristle or felt-covered brush rolls clean effectively without scratching. Some vacuums even allow you to switch off the brush roll entirely for hardwood, further reducing the risk of damage. Lightweight and Maneuverable: Make Cleaning Easy The best vacuum for hardwood floors should be easy to maneuver around furniture and into tight spaces. Stick vacuums and lightweight canister vacuums are often preferred for their agility and ease of use. If you have a large home, choosing a vacuum that’s comfortable to handle for extended periods is essential. Filtration System: Keep the Air Clean A good vacuum doesn’t just clean your floors—it also improves air quality. Look for models with high-efficiency particulate air (HEPA) filters, which trap fine dust particles and allergens. This feature is especially important for households with allergy sufferers or pets. Additional Features: Convenience Matters Modern vacuums offer features that make cleaning hardwood floors even easier. Look for options like: Attachments for Corners and Edges: Specialized tools help clean hard-to-reach areas. Bagless Models with Clear Bins: Easily monitor when it’s time to empty the dustbin. Quiet Operation: Hardwood floors amplify sound, so a quieter vacuum is a big plus. Self-Adjusting Heads: Automatically adapt suction and brush settings to the floor type. Top Recommendations for the Best Vacuum for Hardwood Floors For hardwood floors, consider canister vacuums with soft attachments, stick vacuums for light cleaning, or robot vacuums for daily maintenance. Each offers unique advantages, so choose based on your cleaning habits and home layout. Choosing the right vacuum for hardwood floors can make a significant difference in keeping them spotless and scratch-free. The following models are tailored for hardwood floors, offering a mix of power, precision, and protection. 1. Dyson V15 Detect Features: The Dyson V15 Detect combines powerful suction with innovative laser dust detection, allowing you to see and capture even the finest particles. Its adaptive brush roll transitions seamlessly between surfaces, making it ideal for homes with mixed flooring types. Pros: Lightweight and easy to handle, perfect for quick cleanups. Versatile design works well on hardwood, carpets, and rugs. Laser detection highlights microscopic dust for thorough cleaning. Cons: Premium price tag may not fit all budgets. Smaller dustbin capacity requires frequent emptying. The Dyson V15 Detect is a standout choice for tech enthusiasts and those seeking unparalleled cleaning performance. 2. Miele Complete C3 Alize Features: Known for its durability, the Miele Complete C3 Alize comes with a soft parquet brush that gently cleans hardwood floors without leaving scratches. Its advanced filtration system and quiet motor make it a top-tier option. Pros: Excellent suction power for removing debris and fine dust. Smooth-gliding design minimizes effort while cleaning. High-quality HEPA filtration ensures cleaner air. Cons: Heavier than other models, which may limit portability. Higher price point compared to similar vacuums. The Miele Complete C3 Alize is perfect for homeowners prioritizing long-lasting quality and powerful, gentle cleaning. 3. Shark Navigator Lift-Away Professional Features: This versatile vacuum features a detachable canister, HEPA filtration, and a soft brush roll tailored for hardwood. The Lift-Away design allows for easy cleaning in hard-to-reach areas. Pros: Budget-friendly without compromising performance. Effective at picking up pet hair and allergens. Easy to maneuver around furniture and tight spaces. Cons: Bulkier design compared to lightweight alternatives. The Shark Navigator Lift-Away is ideal for pet owners and families seeking reliable performance at an affordable price. 4. iRobot Roomba j7+ Features: This advanced robot vacuum boasts smart mapping, a self-emptying bin, and dual rubber brushes designed to prevent tangles while gently cleaning hardwood floors. Pros: Hands-free operation saves time and effort. Advanced navigation ensures thorough coverage. Hardwood-friendly brushes minimize damage. Cons: Expensive initial investment. May miss some spots, requiring manual touch-ups. For tech-savvy homeowners who value convenience, the iRobot Roomba j7+ is an excellent addition. 5. Bissell PowerEdge Pet Hardwood Floor Vacuum Features: Specifically designed for hardwood floors, the V-shaped head of the Bissell PowerEdge traps debris along edges and corners effectively, while its lightweight build makes it easy to handle. Pros: Extremely affordable, making it great for budget-conscious buyers. Compact and lightweight for easy storage. Ideal for cleaning pet hair and small messes. Cons: Limited advanced features compared to higher-end models. Not suitable for large spaces or deep cleaning. The Bissell PowerEdge is perfect for smaller homes and quick touch-ups on hardwood floors. Final Thoughts Choosing the best vacuum for hardwood floors ensures that your investment remains spotless and scratch-free for years. While the variety of models can be overwhelming, identifying your specific needs such as pet hair management, room size, or budget simplifies the decision. With this, you’re well-equipped to select the ideal vacuum that combines performance, convenience, and value. Happy cleaning! Ready to elevate your hardwood floor care? Contact Cardenas Flooring today for professional advice, expert hardwood floor services, and maintenance tips tailored to your unique flooring needs. Let us help you keep your floors flawless and your home beautiful! FAQs Can I use a vacuum with a rotating brush on hardwood floors? While some vacuums with rotating brushes are suitable for hardwood floors, ensure the brush roll is soft-bristled or felt-covered to avoid scratches. Alternatively, look for models with a bare-floor mode that disengages the brush roll. Using the wrong type of brush roll can damage

how-to-get-scratches-out-of-hardwood-floors
Flooring Advice

How to Get Scratches Out of Hardwood Floors: Pro Tips & Tricks for a Pristine Finish

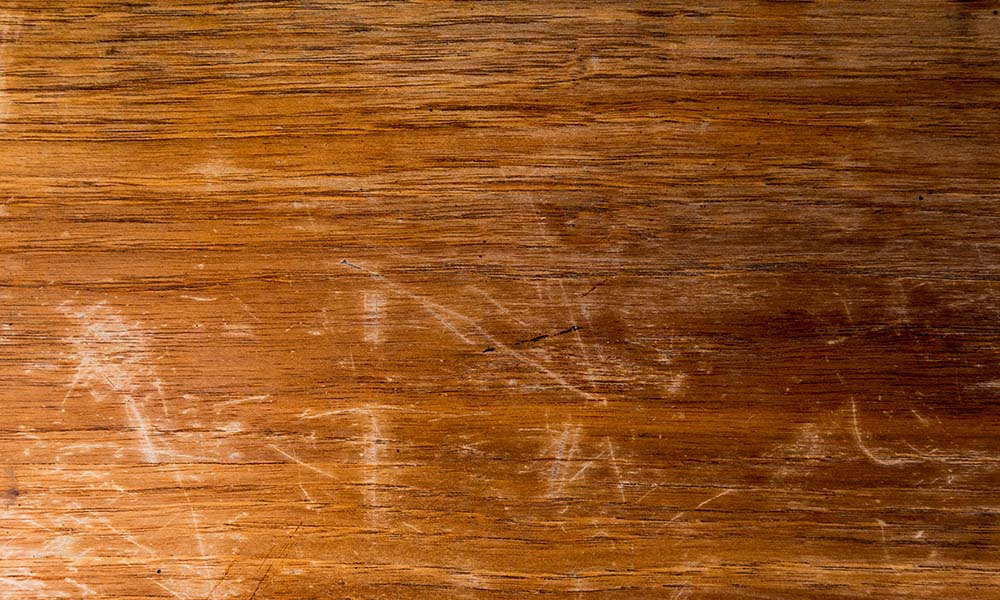
Picture this: you’re admiring the sleek, polished look of your hardwood floors when suddenly, your heart sinks. A scratch whether from moving furniture, a playful pet, or an accidental drop threatens the perfection of your home’s centerpiece. Beyond the aesthetic blow, scratches can lead to deeper damage if left unchecked. But don’t panic! This guide will show you how to get scratches out of hardwood floors, offering expert tips and practical solutions to restore their pristine condition. Solutions That Work: How to Get Scratches Out of Hardwood Floors When dealing with scratches on your hardwood floors, the severity of the scratch determines the most effective solution. From quick fixes for minor scuffs to more intensive repairs for deep gouges, here’s a comprehensive approach to restore your flooring. Minor Scratches: Quick Fixes for Surface Imperfections For surface-level scratches that don’t penetrate the wood, these solutions are often quick and easy: Deep Cleaning First: Sometimes, what looks like a scratch is simply dirt or grime buildup. Start by deep cleaning the area with a damp mop and a hardwood floor cleaner. Use a microfiber cloth to dry the area and inspect the surface carefully to determine if further action is necessary. Walnut Oil Magic: This surprising method works wonders for light scratches. Gently rub the meat of a walnut over the scratch in circular motions. The natural oils in the walnut darken the scratched area, blending it into the surrounding wood. Polish it Up: Use a high-quality hardwood floor polish designed to fill in light scratches and restore the floor’s shine. Apply the polish sparingly, focusing on the scratched areas. Buff with a clean, soft cloth for a smooth finish. This is particularly effective for shallow, parallel scratches that follow the grain. Moderate Scratches: Stepping Up the Effort Moderate scratches require a bit more effort and precision to repair: Touch-Up Markers or Crayons: Available at most hardware stores, wood-specific markers and crayons come in a variety of shades to match your floor. Carefully color in the scratch, using light strokes to avoid over-application. Once colored, buff the area gently with a soft cloth to blend the repair with the surrounding wood. Paste Wax Application: For scratches that go slightly deeper, paste wax offers an effective solution. Using a soft cloth, rub the wax into the scratch, filling the groove. Once the wax has set, buff the area to a shine. This technique works especially well for scratches across the grain. Deep Scratches: Heavy-Duty Repair For scratches that penetrate deeply into the wood, these solutions provide lasting results: Wood Filler Application: Select a wood filler that matches the color of your flooring. Carefully fill the scratch, smoothing it with a putty knife. Allow the filler to dry completely, then sand the area gently until it’s level with the surrounding floor. Apply a matching stain, followed by a sealant, to achieve a seamless finish. Call in the Pros: When scratches cover a large area or are particularly deep, professional refinishing may be the most effective option. Experts can sand and refinish your entire floor, erasing imperfections and restoring the surface to like-new condition Preventing Future Scratches: Tips to Protect Your Floors Keeping your hardwood floors in pristine condition requires a proactive approach. Prevention not only saves you time and money but also maintains the timeless beauty of your flooring. Here are some practical strategies to avoid scratches: Use Furniture Pads: Felt pads are a simple yet effective solution. Attach them to the legs of chairs, tables, and other furniture to prevent them from dragging across the floor. Replace worn pads regularly for continuous protection. Rugs and Mats Strategic placement of rugs and mats can make a world of difference. Use rugs in high-traffic areas, like hallways and entryways, to shield the surface from heavy foot traffic. Placing mats under heavy furniture provides an added layer of protection against dents and scratches. Trim Pet Nails Pets bring joy, but their nails can wreak havoc on hardwood floors. Regular grooming and nail trimming minimize the risk of unsightly scratches. Consider using pet-friendly mats in their favorite lounging areas. Avoid High Heels Indoors High heels exert concentrated pressure that can dent and scratch hardwood. Encourage a no-shoe policy or switch to soft-soled footwear indoors. Sweep Regularly Dirt and debris act like fine sandpaper underfoot. Regular sweeping or vacuuming with a hardwood-safe attachment removes grit before it can cause damage. Final Thoughts Scratches on hardwood floors are a common issue, but they don’t have to be a permanent one. From quick fixes like walnut oil and touch-up markers to professional solutions like wood filler and refinishing, there’s a repair method for every level of damage. By taking preventative measures, such as using furniture pads and trimming pet nails, you can keep your floors looking their best for years to come. Ready to tackle those scratches? With  Cardenas Flooring, your hardwood floors will shine like new in no time. Contact us now. FAQs Can scratches on hardwood floors be completely removed? It depends on the depth of the scratch. Minor surface scratches can often be completely removed using polish, wax, or touch-up markers. Deeper scratches may require wood filler or sanding and refinishing. While the goal is to make scratches less noticeable, some severe gouges might leave a faint mark even after repair. For extensive damage, professional refinishing can restore the floor to a like-new condition. Are DIY solutions for scratches as effective as professional repair? DIY solutions are excellent for minor to moderate scratches and can provide effective, budget-friendly results. Techniques like using touch-up markers, wood fillers, and paste wax often work well for these cases. However, for deep scratches or large damaged areas, professional repair is recommended for the most seamless finish. Experts can refinish the floor entirely, ensuring long-lasting durability and aesthetic appeal. Can scratched hardwood floors be polished without refinishing? Yes, for superficial scratches, applying a high-quality hardwood floor polish can help restore the floor’s shine and mask the imperfections. However, this is a temporary solution and won’t address deeper scratches. For more durable

how-to-deep-clean-hardwood-floors
Flooring Advice

Deep Cleaning Hardwood Floors: The Expert Way

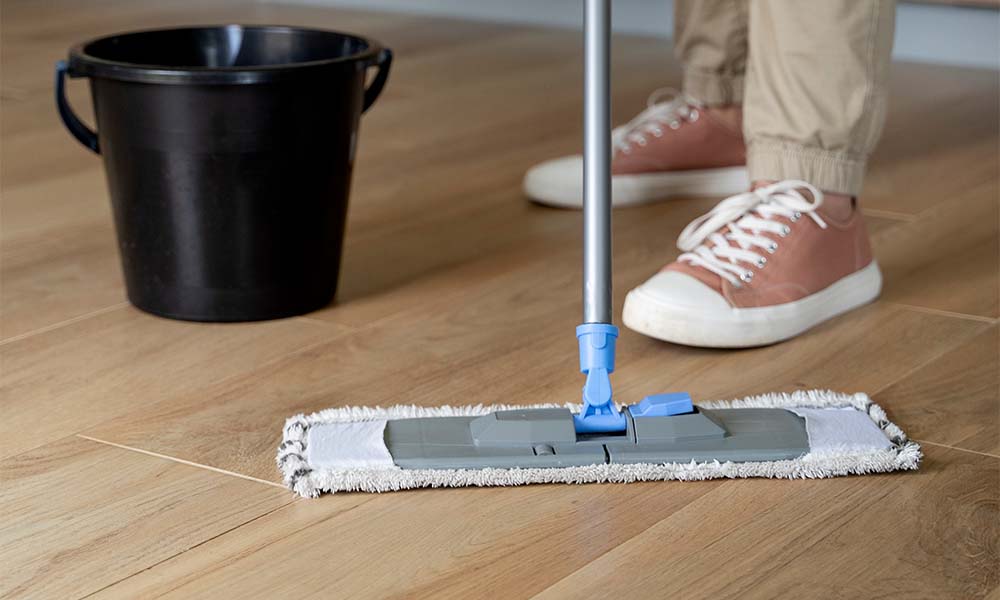
Hardwood floors bring elegance to any home, but maintaining their luster can feel like a constant battle. Everyday sweeping and mopping only handle surface dirt, leaving grime embedded in the wood grain. The solution? Deep cleaning. This guide will walk you through how to deep clean hardwood floors step by step, ensuring they not only look stunning but stay protected for years to come. Preparing for the Deep Clean: Setting the Stage Before jumping into the cleaning process, preparation is key. Think of this as setting the groundwork for a flawless outcome. Step 1: The Furniture Shuffle Start by clearing the floor of all furniture, rugs, and obstacles. Full access ensures you can clean every corner thoroughly, especially under heavy furniture and in forgotten areas like room edges. Step 2: A Quick Sweep or Vacuum Dust and debris can scratch the wood surface during deep cleaning. Use a soft-bristled broom or a vacuum with a hardwood floor attachment to eliminate loose particles. Pay special attention to corners and edges where dirt often accumulates. Step 3: Inspect and Identify Problem Areas Take a close look at your floors. Identify stains, areas of heavy buildup, or any dull spots. Knowing the challenges ahead allows you to use the right cleaning solutions for each issue. Choosing Your Cleaning Arsenal: Solutions That Work Selecting the right cleaning tools and products can make or break your deep cleaning success. The Right Cleaning Solution A mixture of warm water and a pH-neutral hardwood cleaner works wonders for most hardwood floors. Avoid harsh chemicals like bleach or ammonia, as they can strip the finish and harm the wood. Add a few drops of gentle dish soap for extra cleaning power if needed. Why Microfiber Rules Microfiber mops and cloths are game changers for hardwood cleaning. They effectively trap dust and dirt without scratching, and they’re lightweight and easy to use. Deep Cleaning Your Hardwood Floors: Step-by-Step Once prepared, it’s time to dive into the cleaning process. Follow these steps for the best results: The Damp Mop Method Prepare a bucket with warm water and your chosen hardwood-safe cleaner. Dip your microfiber mop, then wring it out until it’s just damp—not soaking wet. Mop in small sections, overlapping strokes to ensure no area is missed. Rinse and wring the mop frequently. You’ll be amazed at how much dirt it picks up. Allow the floor to air dry completely before moving on. Tackling Stubborn Stains Apply a small amount of cleaner directly to persistent stains. Use a soft-bristled brush to gently scrub in a circular motion. Always test the cleaner on an inconspicuous area first to avoid unwanted damage. The Finishing Touch Once the floors are dry, buff them with a dry microfiber cloth. This step enhances the shine, leaving your floors gleaming like new. Maintaining Your Sparkling Floors: Post-Cleaning Care Deep cleaning restores your floors, but consistent care keeps them looking their best in the long term. Regular Sweeping and Vacuuming Dust and dirt act like sandpaper, dulling the finish over time. Sweep or vacuum daily in high-traffic areas and at least weekly elsewhere. Use tools designed for hardwood to avoid scratches. Spot Cleaning for Spills and Stains Address spills as soon as they happen. A damp cloth and hardwood-safe cleaner prevent staining and damage. Protective Measures Doormats and Rugs: Place them at entryways to trap dirt and moisture. Furniture Pads: Attach felt pads to furniture legs to prevent scratches. Pet Care: Trim pets’ nails regularly and clean up accidents promptly. Parting Thoughts Deep cleaning hardwood floors doesn’t need to be a daunting task. By following the proper steps and using the right tools, you can achieve a stunning, long-lasting shine. Regular maintenance ensures your efforts pay off, keeping your floors radiant for years to come. With consistent care, your hardwood floors will continue to enhance the beauty of your home, making every effort worthwhile. Ready to restore your hardwood floors to their original beauty? Contact Cardenas Flooring for expert cleaning, refinishing, and repair services. Let us handle the hard work while you enjoy stunning, long-lasting results. Contact us now for a free consultation! Frequently Asked Questions (FAQs) How often should I deep clean my hardwood floors? Deep cleaning your hardwood floors every 2-3 months is ideal to maintain their appearance and prevent buildup. If you have pets, children, or heavy foot traffic, you may need to deep clean more frequently. Regular maintenance such as sweeping and spot cleaning can help extend the time between deep cleanings while keeping your floors in good condition. Can I use vinegar to clean hardwood floors? While diluted vinegar is a popular DIY cleaning solution, it can be too harsh for some hardwood finishes. Vinegar’s acidity may strip away protective coatings over time, leaving your floors vulnerable to damage. For safer results, opt for a pH-neutral cleaner specifically designed for hardwood floors, and always test new solutions in an inconspicuous area. Are steam cleaners safe for hardwood floors? Steam cleaners are generally not recommended for hardwood floors as the high heat and moisture can damage the wood and cause warping or cupping. Always check the manufacturer’s guidelines for your flooring, as some sealed hardwoods may tolerate steam cleaning. If unsure, stick to safer methods like damp mopping with hardwood-safe cleaners. What can I do to prevent scratches on hardwood floors? To minimize scratches, use felt pads on furniture legs, avoid dragging heavy objects, and regularly trim pet nails. Place rugs or mats in high-traffic areas and at entry points to trap dirt and grit that can scratch your floors. Sweeping or vacuuming daily with a soft-bristled attachment also helps reduce surface damage. What should I do if my hardwood floors look dull after cleaning? Dull floors may indicate a buildup of cleaning residue or wax. Try a deep clean with a hardwood-safe cleaner to remove any film. If the dullness persists, consider using a hardwood floor polish to restore shine. For long-term maintenance, avoid using products not specifically designed for hardwood floors.

how-to-fix-water-damaged-hardwood-floors
Flooring Advice

How to Fix Water-Damaged Hardwood Floors: Solutions That Work

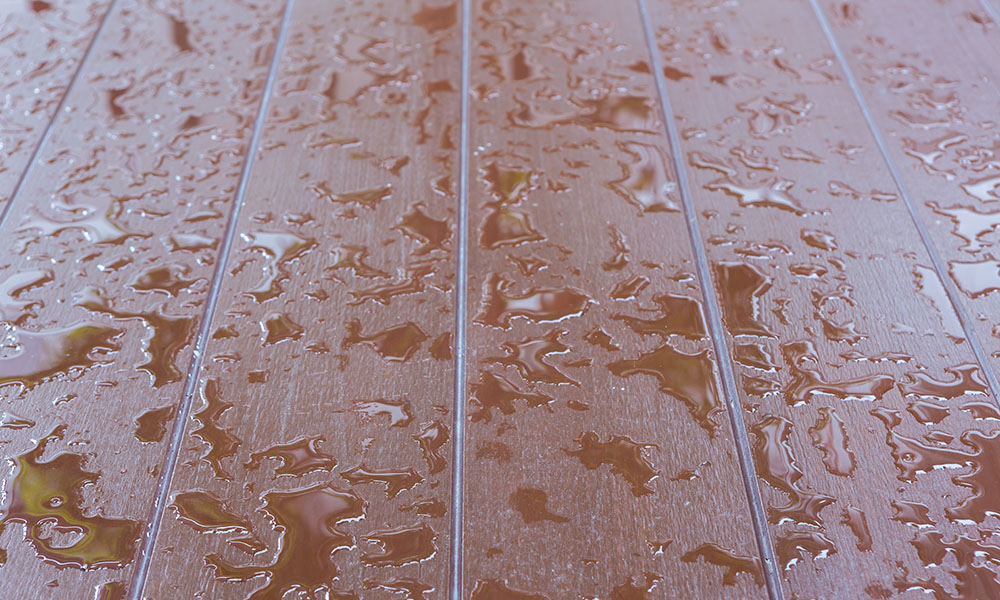
Water-damaged hardwood floors can turn a stunning feature of your home into a disheartening eyesore. Warping, buckling, and discoloration are common signs, and ignoring the issue can lead to further damage, including structural problems. But don’t despair this guide is here to help you navigate solutions, whether it’s a simple DIY repair or a more intensive professional intervention. With the right approach, your floors can return to their former glory, shining as a centerpiece in your home. Assessing the Damage: Understanding the Severity Before diving into solutions, understanding the extent of water damage is crucial. Assessing the severity will guide you in choosing the appropriate fix and prevent unnecessary costs. 1. Minor Damage: Indicators: Surface moisture, slight discoloration, or mild warping. Solution: Often treatable with quick drying and minor touch-ups. 2. Moderate Damage: Indicators: Cupping (edges rising higher than the center) or crowning (center higher than edges). Solution: Requires sanding and refinishing after thorough drying. 3. Severe Damage: Indicators: Extreme warping, visible rot, or mold growth. Solution: Replacement of affected planks or entire sections may be necessary. DIY Methods: How to Fix Water-Damaged Hardwood Floors Water damage can be distressing, but minor issues can often be tackled with effective DIY techniques. Here’s a step-by-step guide to fixing water-damaged hardwood floors. Step 1: Dry Out the Affected Area Drying is the foundation of any successful repair. Without thoroughly drying the area, subsequent steps may not work effectively. Dehumidifiers and Fans: Place high-powered fans and dehumidifiers around the damaged area to extract moisture. Position fans to circulate air and direct airflow across the surface. Ventilation: Open windows to promote cross-ventilation, but be cautious of outdoor humidity, as excessive moisture can prolong the drying process. Monitor Progress: Use a moisture meter to ensure the hardwood’s moisture level returns to its normal range (typically 6–12%). This process may take several days or even weeks, depending on the extent of the damage. Step 2: Flattening Minor Warping For boards that have begun to warp but aren’t severely damaged, you can restore their shape with these steps: Dampen the Underside: Gently dampen the underside of the warped plank with a cloth to make the wood pliable. Avoid over-saturating, as this can worsen the problem. Apply Clamps: Slowly and evenly apply pressure to the warped area using clamps. Place a flat piece of wood between the clamp and the surface to distribute pressure and prevent damage. Dry While Clamped: Allow the board to dry completely while clamped in place. This may take 24–48 hours. Step 3: Sanding and Refinishing Once the floor is completely dry: Sanding: Use fine-grit sandpaper to even out minor warping and remove discoloration. Staining: Match a wood stain to the existing floor and carefully apply it to the repaired area. Sealant Application: Finish with a protective sealant to restore the floor’s durability and sheen. Professional Repairs for Advanced Issues When the damage is severe, DIY methods may not suffice. Professional intervention is crucial in these cases. Replacing Damaged Boards For irreparably warped, rotted, or broken planks: Removal: Carefully pry out damaged boards using specialized tools to avoid damaging surrounding planks. Matching Materials: Select new boards that match the wood type, color, and finish of your existing floor. Installation: Align and install new boards, ensuring they are properly secured and seamlessly integrated. Addressing Mold Growth Mold growth indicates prolonged moisture exposure and must be handled promptly: Professional Mold Remediation: Enlist experts to safely eliminate mold and prevent health hazards. Board Replacement: Replace all affected boards to stop the spread and restore structural integrity. By following these steps, you can effectively address water damage and restore the beauty and functionality of your hardwood floors. Preventing Future Water Damage: Proactive Measures 1. Fix Leaks Immediately Even minor leaks from plumbing or appliances can cause significant damage over time. Regular inspections and prompt repairs are essential. 2. Use Rugs and Mats Place waterproof mats in high-risk areas such as entryways, kitchens, and bathrooms to catch spills and prevent moisture from seeping into the wood. 3. Regular Maintenance Clean spills immediately with a dry or slightly damp cloth. Reapply protective sealants every few years to maintain the floor’s resistance to water. Final Thoughts Dealing with water-damaged hardwood floors can be overwhelming, but with the right steps, you can restore their beauty and functionality. Assess the damage carefully, act quickly to dry out the area, and choose the appropriate repair method based on severity. Remember, proactive measures like regular maintenance and addressing leaks promptly are your best defense against future issues. Whether you tackle the repairs yourself or enlist professional help, your hardwood floors can shine again, adding elegance and value to your home for years to come. Say goodbye to dull, damaged hardwood floors with Cardenas Flooring’s expert services. We’ll restore their shine and extend their lifespan. Contact us today to schedule an appointment and experience the difference of professional flooring care! FAQs How do I know if water-damaged hardwood floors need to be replaced or repaired? The decision depends on the severity of the damage. If the wood has minor warping, discoloration, or surface-level issues, sanding and refinishing might be sufficient. However, if the boards show signs of significant warping, mold, rot, or structural instability, replacement is necessary. Assess the damage carefully, and if you’re unsure, consult a flooring professional to determine the best course of action. Can I fix water-damaged hardwood floors without professional help? Minor water damage, such as surface-level discoloration or slight warping, can often be repaired with DIY methods like drying, sanding, and refinishing. However, more severe damage, such as mold, deep warping, or extensive rotting, typically requires professional repair or replacement to ensure safety and durability. Attempting DIY fixes on serious damage may lead to further issues. What is the best way to dry water-damaged hardwood floors? Use a combination of dehumidifiers, high-powered fans, and proper ventilation to extract moisture. Open windows if the weather permits or use an air conditioner to control humidity. Avoid using direct heat sources like hairdryers, as uneven drying can cause additional warping. The drying process may take several days or even weeks, depending on the extent of the water

how-to-protect-hardwood-floors
Flooring Advice

Protecting Hardwood Floors: Tips to Maintain Their Beauty

Hardwood floors are a timeless addition to any home, offering sophistication, durability, and value. Yet, they require proper care to maintain their shine and prevent damage. Scratches, dents, and fading are common concerns, but with the right strategies, you can keep your floors gleaming. This guide will show you how to protect hardwood floors and preserve their natural beauty for decades. Understanding Your Hardwood Floors: The Foundation of Care To protect hardwood floors effectively, you must first understand their unique characteristics. Hardwood floors come in various types, including oak, maple, and cherry, each with distinct hardness levels and maintenance requirements. For instance: Hardwoods like oak and maple are more resistant to wear and tear. Softer woods like pine require extra caution to avoid dents and scratches. Knowing your floor’s type helps you choose appropriate cleaning products and preventive measures tailored to its needs. Daily Care: Simple Habits for Long-lasting Beauty Consistent daily maintenance can make a significant difference in your floor’s longevity. Here’s how to implement simple habits to protect hardwood floors: 1. Sweep or Vacuum Regularly Dirt and debris act like sandpaper, scratching the floor’s finish. Use a soft-bristled broom or a vacuum with a hardwood floor attachment to remove these particles. High-traffic areas may need daily attention, while other areas can be cleaned a few times a week. 2. Use Doormats and Rugs Placing doormats at entrances traps dirt and moisture before they reach your floors. Area rugs in high-traffic zones, such as hallways or under dining tables, add an extra layer of protection. 3. Address Spills Immediately Spills can cause stains or seep into the wood, leading to warping. Wipe up spills with a soft, damp cloth as soon as they occur. Avoid letting water sit on the surface, as hardwood is sensitive to moisture. 4. Avoid Hard-soled or High-heeled Shoes Shoes with hard soles or heels can leave dents. Opt for soft-soled footwear indoors, or consider creating a no-shoe policy to further protect your floors. Deep Cleaning: Giving Your Floors the TLC They Deserve Periodic deep cleaning removes grime that daily sweeping can’t address, restoring your floor’s shine. Follow these steps: 1. Choose a Hardwood-specific Cleaner Harsh chemicals like bleach and ammonia can strip the floor’s finish. Instead, use a pH-neutral cleaner designed for hardwood, or a homemade solution of warm water and mild dish soap. 2. Use a Damp Mop Excess water can damage hardwood, so ensure your mop is damp, not wet. Clean in small sections and dry each area immediately to prevent water spots. 3. Polish Occasionally Polishing your floors every few months helps maintain their shine and adds a protective layer against future damage. Use a high-quality polish and follow the manufacturer’s instructions. Protecting Hardwood Floors From Furniture and Pets 1. Furniture Protection Felt Pads: Attach felt pads to furniture legs to prevent scratches when moving chairs or tables. Rugs and Runners: Use area rugs or runners in high-traffic spaces, like living rooms, to shield floors from wear. 2. Pet Protection Trim Pet Nails: Long nails can leave scratches on hardwood. Regular nail trimming reduces this risk. Designated Play Areas: Place rugs or mats in areas where pets play or eat to minimize damage. Preventing Scratches and Dents Preventing scratches and dents requires thoughtful planning: Use Furniture Coasters: When moving heavy items, use coasters or lift the furniture instead of dragging it. Protective Mats: Place waterproof mats in areas prone to moisture, such as near sinks or entryways. Seasonal Humidity Control: Wood expands and contracts with humidity changes. Use a humidifier in winter and a dehumidifier in summer to maintain stable indoor conditions. Refinishing and Repairs: Restoring the Luster Over time, hardwood floors may develop scratches, dullness, or discoloration. Refinishing and minor repairs can bring them back to life: Refinishing: Sanding and refinishing remove surface damage, restoring the floor’s original appearance. Floors with thicker planks can be refinished multiple times, making this a cost-effective option for long-term care. Spot Repairs: For localized damage, such as scratches or dents, use wood fillers or touch-up markers to address the issue without refinishing the entire floor. Conclusion Hardwood floors are a significant investment, but their beauty and longevity make them worth the effort. By adopting consistent cleaning habits, using preventive measures, and addressing minor issues promptly. you can keep your floors looking stunning for years. Whether it’s daily care, deep cleaning, or refinishing, understanding how to protect hardwood floors ensures they remain a source of pride and value in your home. Remember, a little care today saves significant costs tomorrow! Keep your hardwood floors looking pristine with professional care from Cardenas Flooring. From tackling water damage to routine maintenance, we’re here to help. Reach out to us now for reliable, high-quality flooring solutions. FAQs How often should I clean my hardwood floors? For best results, sweep or vacuum daily to remove dirt and debris that can scratch the surface. Damp mop weekly or biweekly, depending on foot traffic, using a hardwood-specific cleaner. High-traffic areas, like entryways and kitchens, may need more frequent cleaning. Avoid oversaturating the mop and ensure the floor dries quickly to prevent moisture damage. Can rugs with rubber backings damage hardwood floors? Yes, rugs with rubber or latex backings can trap moisture, leading to discoloration or warping over time. Instead, use rugs with natural fibers or add a felt or breathable rug pad underneath to protect the floor. Regularly clean under rugs to prevent dirt buildup, which can scratch the hardwood. How do I fix scratches on hardwood floors? Minor scratches can be repaired with wood touch-up markers, blending wax sticks, or scratch-removal kits available at hardware stores. For deeper scratches, consider using a wood filler that matches the floor’s color, followed by light sanding and polishing. If the scratches are widespread, professional refinishing may be necessary. What is the best way to protect hardwood floors from furniture? Attach felt pads to the legs of furniture to prevent scratches when items are moved. Replace these pads regularly as they can wear down. Use area rugs in high-traffic spaces to shield floors from heavy furniture. When

how-to-get-paint-off-hardwood-floors
Flooring Advice

How to Get Paint Off Hardwood Floors Without Damage

Hardwood floors are an elegant addition to any home, but paint spills can make them look anything but. Whether you’re painting walls, furniture, or a masterpiece, a stray splash can cause instant panic. Rest assured, there’s no need to fret. With the proper methods and tools, you can clean paint off hardwood floors without leaving a trace. From fresh spills to stubborn dried paint, this guide offers detailed steps to restore your floors while preserving their natural beauty. Assessing the Damage: What Kind of Paint is It? Before you start scrubbing, identify the type of paint. This determines the most effective removal technique and minimizes the risk of damaging your floor. Water-Based Paint (Latex) Easy to remove when wet, requiring minimal effort and gentle cleaning solutions. Oil-Based Paint More stubborn, often needing solvents or scrapers to lift the dried material without harming the wood, Dried Paint The longer the paint sits, the harder it becomes to remove, often necessitating advanced methods like chemical solutions or heat treatments. Understanding the type of paint helps tailor your approach for optimal results. Method 1: The Gentle Approach (For Fresh Spills) Acting quickly on fresh spills is crucial. Here’s how to handle wet paint effectively: Blot, Don’t Rub Use a soft cloth or paper towel to blot the spill gently. Rubbing spreads the paint and embeds it deeper into the wood grain. Add Warm Water Dampen the cloth with warm water and lightly press it against the spill to loosen the paint. Avoid saturating the floor. Repeat as Needed Continue blotting until the paint is completely removed. This method works best for water-based paints and ensures the floor’s finish remains intact. Method 2: The Scrape and Wipe For paint that has started to dry, a plastic scraper can save the day. Choose the Right Tool: Use a plastic scraper or a putty knife to prevent scratches. Avoid metal scrapers unless they are specifically designed for delicate surfaces. Scrape Gently: Hold the scraper at a shallow angle and slowly lift the paint. Work in small sections to maintain control. Clean the Residue: Wipe away loosened paint with a damp microfiber cloth, ensuring no debris is left behind. Patience is key with this method, as rushing can harm the wood’s finish. Method 3: The Chemical Assist For stubborn oil-based paints or dried spills, a chemical remover may be necessary. Follow these steps carefully: Select a Product Choose a hardwood-safe paint remover or mineral spirits. Avoid harsh chemicals that can damage the finish. Test First Apply a small amount to an inconspicuous area to ensure compatibility with your flooring. Apply and Wait Use a cloth to apply the solution to the paint. Let it sit for a few minutes to soften the paint. Remove the Paint Gently scrape or wipe away the softened paint using a cloth or plastic scraper. Clean Thoroughly Wipe the area with a damp cloth to remove any chemical residue. Always ensure proper ventilation when working with chemicals and wear gloves to protect your hands. Method 4: The Heat Treatment (Use with Caution) Heat can soften dried paint, making it easier to remove. This method requires caution to prevent damaging the wood. Prepare the Area Use a hairdryer or heat gun on a low setting to direct heat at the paint. Apply Heat Gradually Heat the paint for a few seconds at a time. Overheating can damage the floor’s finish or cause discoloration. Scrape Carefully Once the paint softens, gently scrape it away with a plastic scraper. Clean Residue Wipe the area with a damp cloth to remove any remaining paint or residue. Heat is effective but should always be a last resort due to the potential risks involved. Prevention is Key: Protecting Your Hardwood Floors During Painting Projects The best way to deal with paint spills is to prevent them from happening in the first place. Follow these tips for foolproof floor protection: Use Drop Cloths: Cover your floors with heavy-duty drop cloths or plastic sheets. Ensure they’re securely taped around the edges. Tape Liberally: Apply painter’s tape along the baseboards and edges of the room to catch stray drips. Keep Cleanup Supplies Handy: Have a damp cloth or sponge within reach to address minor drips immediately. Be Mindful of Foot Traffic: Limit movement in the painting area to reduce the risk of accidental spills. Proper preparation can save hours of cleanup and prevent potential damage to your floors. The Final Verdict Removing paint from hardwood floors can be daunting, but with the right techniques, it’s entirely manageable. From quick blotting of fresh spills to tackling stubborn dried paint with chemical solutions or heat, these methods are designed to preserve your floor’s beauty. Prevention, of course, remains the best approach cover your floors carefully and keep cleanup tools nearby during any painting project. By following this guide, you can handle paint spills like a pro, ensuring your hardwood floors stay pristine and elegant for years to come. Keep your hardwood floors looking pristine with professional care from Cardenas Flooring. From tackling water damage to routine maintenance, we’re here to help. Reach out to us now for reliable, high-quality flooring solutions. FAQs Can I use a razor blade to remove dried paint from hardwood floors? While a razor blade can help remove dried paint, it’s not recommended for hardwood floors due to the high risk of scratching the surface. Instead, use a plastic scraper or a putty knife held at a shallow angle to avoid damage. Always proceed gently and consider softening the paint with warm water or a chemical solution first for easier removal. What’s the best way to remove paint from hardwood floors without chemicals? For fresh spills or small dried spots, start with a damp cloth or a mixture of warm water and mild dish soap. For stubborn paint, use a plastic scraper or apply heat with a hairdryer to soften the paint before gently scraping. Always avoid abrasive tools to protect the wood’s finish. How do I remove paint from hardwood floors

Scroll to Top