Flooring Advice

laminate flooring repair
Flooring Advice

Quick Fixes for Laminate Flooring: Repair Like a Pro in Simple Steps

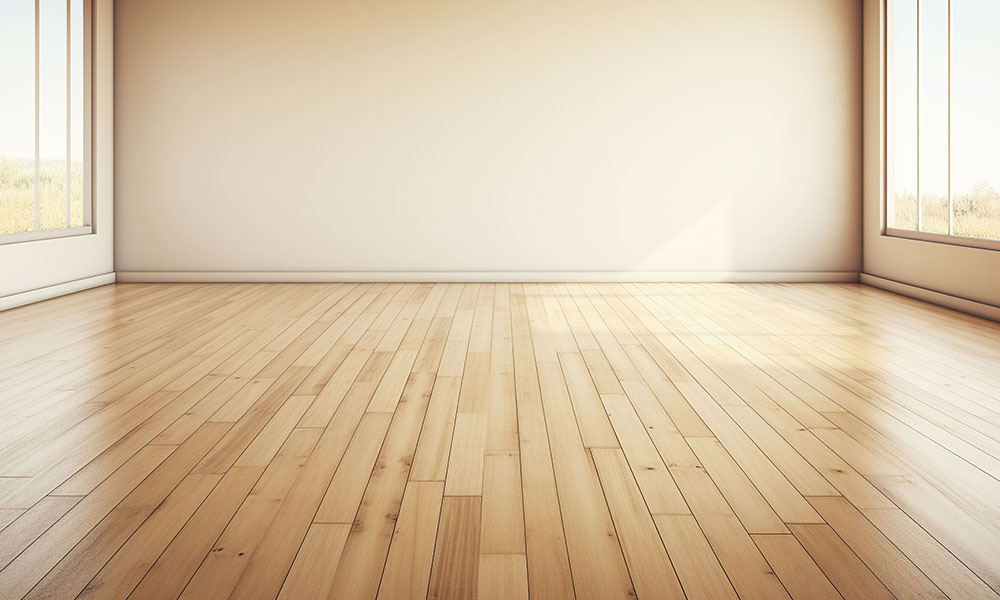
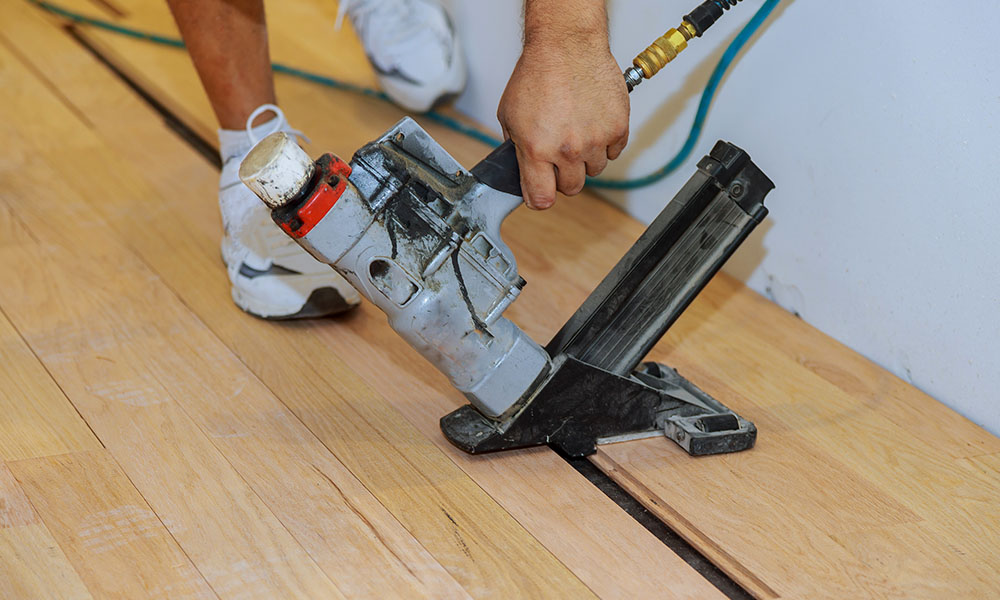
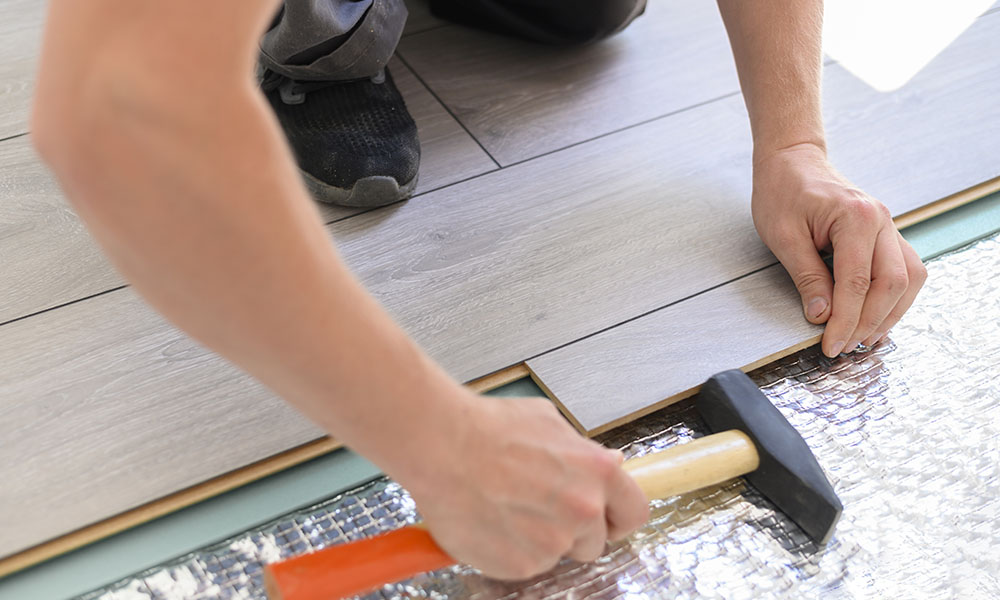
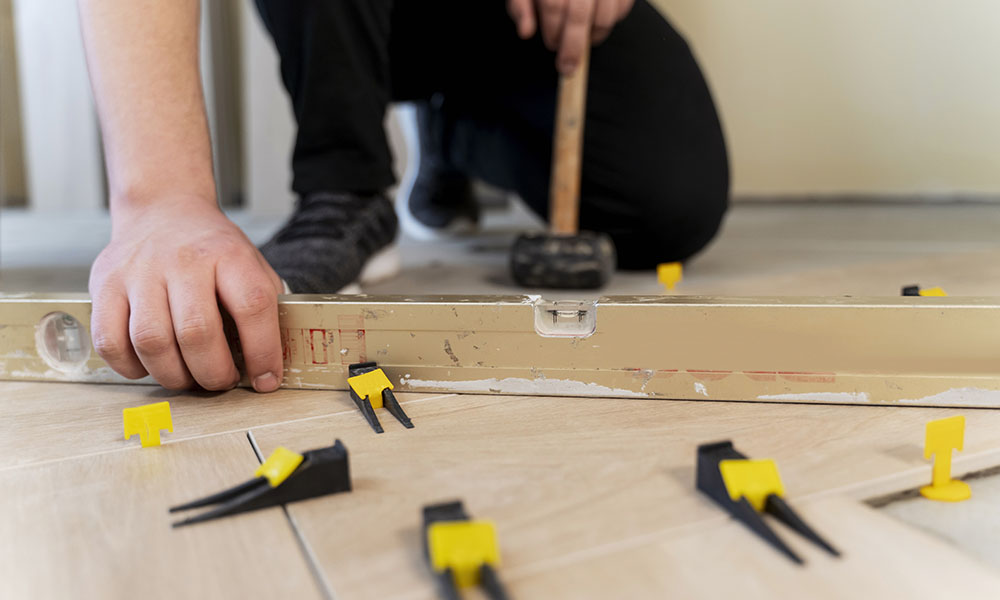
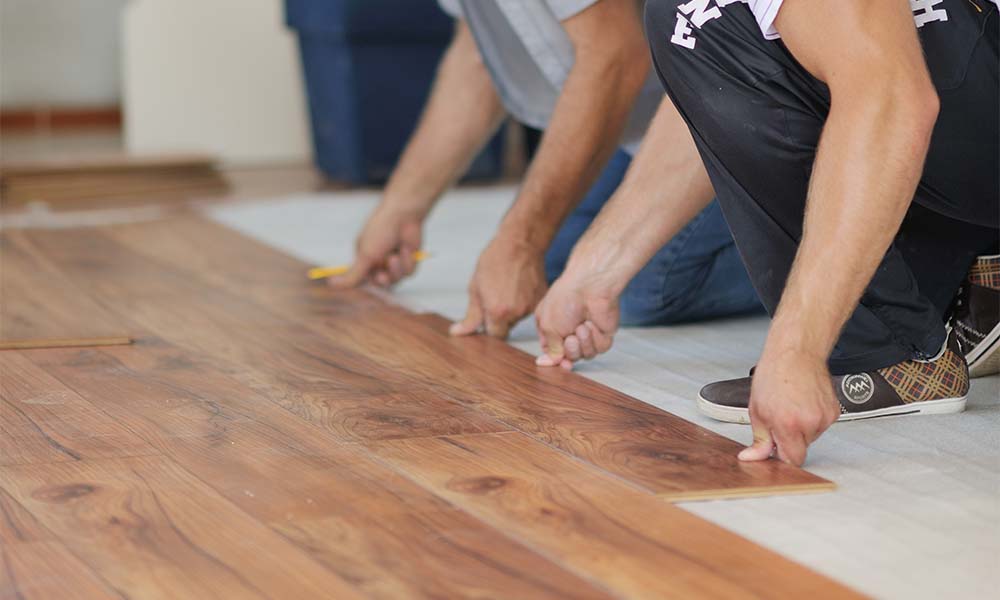
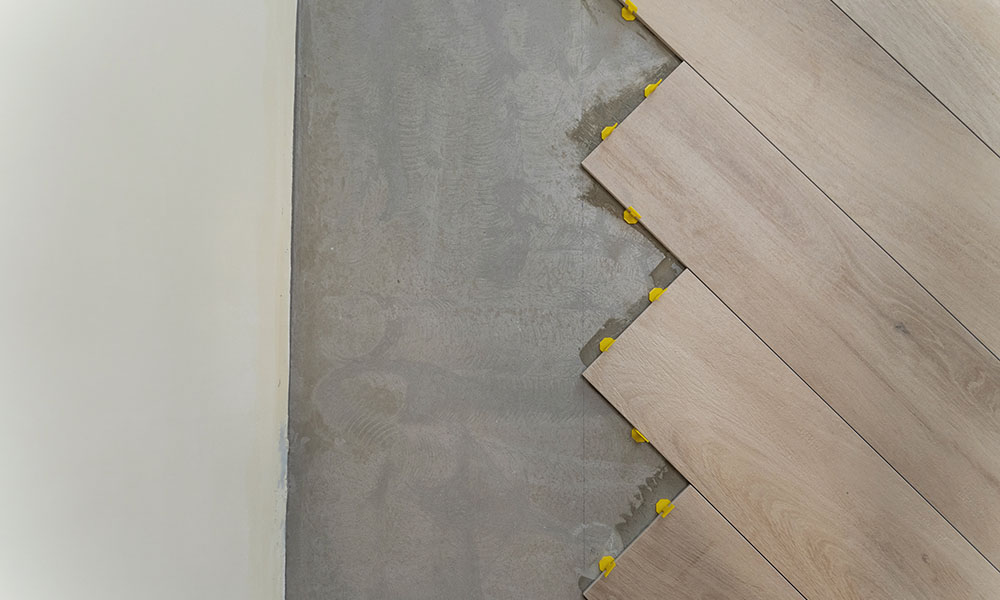
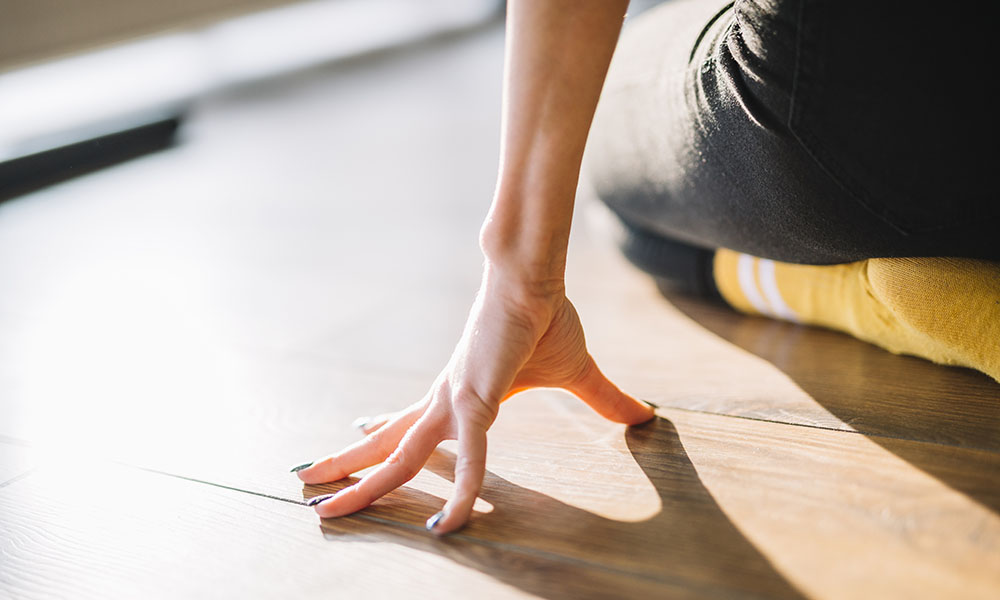
Laminate flooring repair doesn’t have to feel overwhelming. Most issues can be fixed quickly with the right tools and techniques. Whether you’re dealing with cracks, scratches, or gaps, addressing these problems early can keep your flooring looking great for years to come. Here’s how you can tackle common laminate flooring issues like a pro. Understanding Common Laminate Flooring Issues Laminate flooring is durable but not immune to wear and tear. Everyday activities, shifting furniture, or environmental changes can lead to issues like cracks, scratches, or gaps. Understanding these problems is the first step in repairing them effectively. Cracks and Chips Cracks and chips often occur in high-traffic areas or where heavy objects are dropped. These small imperfections can quickly grow if ignored. For example, a crack might expand under continued pressure, making the floor less stable. Chips can expose the underlayer, which not only looks unattractive but can also invite moisture damage. Quick Fix: Use a laminate repair putty or wax filler in a matching color. Smooth it into the damaged area with a putty knife and wipe away excess for a seamless finish. Scratches and Surface Scuffs Scratches and scuffs are the most common issues with laminate flooring. They’re often caused by dragging furniture, pet claws, or even everyday dirt particles acting like sandpaper underfoot. While surface scuffs may seem minor, they can dull the flooring’s finish over time. Quick Fix: Use a laminate flooring repair kit with touch-up markers or wax crayons. Buff the area gently after applying the color to blend it into the surrounding surface. Warping and Buckling Warping and buckling occur when moisture seeps into the laminate or when the flooring doesn’t have enough room to expand and contract with temperature changes. These issues can make walking on the floor uneven and potentially dangerous. Quick Fix: For warped planks, consider replacing them if the damage is severe. To prevent further issues, check for moisture sources and ensure proper room ventilation. Gaps Between Planks Over time, gaps can form between laminate planks due to fluctuations in temperature or improper installation. These gaps not only disrupt the look of the floor but also create areas where dirt can collect. Quick Fix: Use floor clamps to pull the planks back together. For a more permanent fix, fill gaps with color-matching caulk or adhesive to keep them sealed. Essential Tools and Materials for Laminate Flooring Repair Having the right tools and materials on hand makes laminate flooring repair straightforward. Here’s what you’ll need to get started. Must-Have Repair Tools Putty Knife: This is used to fill cracks and chips smoothly. Touch-Up Markers or Wax Crayons: Ideal for scratches and surface scuffs. Clamps: Useful for pulling planks back together when dealing with gaps. Utility Knife: To cut and replace damaged planks with precision. Sandpaper: For smoothing filled areas and blending repairs seamlessly. Choosing the Right Repair Materials Laminate Repair Kits: These often include putty, markers, and wax fillers in a range of colors to match your flooring. Adhesives: Use high-strength, waterproof adhesives for securing loose planks or fixing gaps. Replacement Planks: Always keep extra laminate planks from your original installation for severe damage repairs. Moisture Barriers: To prevent future warping, especially if moisture caused the original damage. Step-by-Step Laminate Flooring Repair Guide Tackling laminate flooring repair is simpler than it seems when you have a clear process. Each issue requires specific steps to fix it effectively. Follow this guide to address common problems and keep your flooring looking and functioning like new. Fixing Cracks and Chips Cracks and chips can make your laminate flooring look worn out and vulnerable to further damage. Repairing these flaws helps maintain both appearance and durability. Step 1: Clean the damaged area to remove dust or debris. Use a slightly damp cloth and let the area dry completely. Step 2: Apply laminate repair putty or a wax filler in a matching color to the crack or chip. These are available in laminate repair kits. Step 3: Use a putty knife to smooth the filler, ensuring it’s flush with the surrounding surface. Step 4: Wipe away any excess filler and let it dry as per the manufacturer’s instructions. Step 5: Once dry, lightly sand the repaired area for a seamless finish. Removing Scratches and Scuffs Scratches and scuffs are inevitable, but they don’t have to ruin the look of your flooring. Addressing them quickly prevents further wear and tear. Step 1: Clean the surface to ensure no dirt or dust interferes with the repair. Step 2: Use a laminate touch-up marker or wax crayon in the same shade as your flooring to color the scratch. Step 3: Blend the color by buffing the area gently with a soft cloth. Step 4: For deeper scratches, consider applying a laminate repair putty and sanding it down for an even finish. Repairing Warped or Buckled Planks Warped or buckled planks can create an uneven surface, which is both unsightly and a potential tripping hazard. Address these problems to restore the floor’s stability. Step 1: Identify the cause of the warping, such as moisture or lack of expansion space. Step 2: If the damage is minor, weigh down the affected planks with a heavy object to flatten them over time. Step 3: For severe warping, carefully remove the damaged plank using a utility knife or pry bar. Step 4: Replace the plank with one of the same type and size, securing it with adhesive if necessary. Step 5: Ensure proper ventilation or moisture control to prevent future warping. Closing Gaps Between Planks Gaps between planks not only affect aesthetics but also collect dirt, making cleaning harder. Fixing these gaps is simple with the right approach. Step 1: Place a floor clamp across the affected planks and tighten it to pull them back together. Step 2: Use a color-matching caulk or adhesive to fill any visible gaps. Step 3: Smooth the caulk with a putty knife and wipe away excess material. Step 4: Allow the adhesive to cure fully before walking on the repaired section. Preventive Measures to Avoid Future Damage Preventing laminate flooring damage is easier and more cost-effective than frequent repairs. Simple practices can protect your floors for years. Maintaining

bamboo hardwood flooring
Flooring Advice

5 Reasons Bamboo Hardwood Flooring is a Game-Changer for Eco-Friendly Living

Sustainability might not always come to mind when you think about flooring options. However, as homeowners and businesses strive to adopt greener lifestyles, bamboo hardwood flooring has emerged as an eco-friendly superstar. It’s not just flooring; it’s a way to reduce your carbon footprint without compromising on style or durability. Imagine stepping into a home where the floors are beautiful and help save the planet. Bamboo hardwood flooring offers that possibility. Its fast-growing nature, durability, and versatility make it the ideal choice for anyone looking to make a sustainable impact. In this blog, we’ll explore why bamboo hardwood flooring stands out as a game-changer for eco-friendly living. What Makes Bamboo a Unique Flooring Material? Bamboo is often mistaken for wood, but it’s actually a type of grass. This distinction is part of what makes it such a unique and sustainable material. Unlike hardwood trees, which can take decades to mature, bamboo regenerates quickly and can be harvested in as little as five years. Its rapid growth rate is just one reason why it’s such an environmentally friendly choice. Another standout feature of bamboo is its strength. Strand-woven bamboo, one of the most popular types used in flooring, is incredibly durable, often outperforming traditional hardwoods like oak and maple. Bamboo is also naturally resistant to moisture, mold, and pests, making it a practical option for a wide range of environments. How Bamboo Hardwood Flooring is Made The process of creating bamboo hardwood flooring is a testament to innovation and sustainability. Here’s how it works: Harvesting: Mature bamboo stalks are harvested after about 5–7 years of growth. This process doesn’t damage the root system, allowing the plant to regenerate quickly. Stripping and Treating: The stalks are stripped into thin layers, boiled to remove starches and sugars, and treated to resist pests and mold. Pressing: For strand-woven bamboo, the strips are shredded and compressed under high pressure with adhesives, creating a dense, durable material. Finishing: The pressed bamboo is cut into planks, sanded, and coated with protective finishes. These finishes are often low in volatile organic compounds (VOCs), making them safer for indoor air quality. This meticulous process results in bamboo hardwood flooring that is not only beautiful but also highly functional and sustainable. Reason 1: Bamboo is a Renewable Resource Bamboo’s rapid growth cycle and ability to regenerate make it one of the most renewable materials available. Choosing bamboo flooring supports sustainable practices. Fast Growth Compared to Traditional Hardwood One of bamboo’s most compelling features is its rapid growth. While traditional hardwood trees like oak or walnut can take 20–100 years to mature, bamboo is ready for harvest in just 5–7 years. This short growth cycle allows for frequent harvesting without depleting the ecosystem. Imagine the environmental impact of replacing hardwood trees every few decades versus harvesting bamboo every few years. Bamboo’s ability to regenerate quickly from its root system makes it a renewable resource that can meet the demands of modern living without causing deforestation. Minimal Environmental Impact Bamboo cultivation requires fewer resources compared to hardwood trees. It grows densely, requires less land, and thrives without the need for chemical fertilizers or pesticides. Additionally, its extensive root system helps prevent soil erosion, maintaining the health of the land it grows on. This minimal impact on the environment makes bamboo a responsible choice for those who care about the planet. Opting for bamboo hardwood flooring is a step toward reducing the strain on natural resources. Reason 2: Bamboo Flooring Reduces Carbon Footprint Bamboo absorbs more carbon dioxide during its growth than many traditional hardwoods, making it an excellent choice for reducing environmental impact. Carbon Absorption During Growth Bamboo is a carbon sink, meaning it absorbs more carbon dioxide than it emits during its growth. In fact, bamboo forests capture significantly more CO2 than an equivalent area of hardwood forest, helping combat climate change. When you choose bamboo hardwood flooring, you’re not just adding style to your home; you’re also contributing to the reduction of greenhouse gases in the atmosphere. This unique characteristic makes bamboo a standout choice for eco-conscious homeowners. Sustainable Manufacturing Practices The manufacturing process for bamboo flooring often involves fewer energy-intensive steps compared to traditional hardwood. Many manufacturers also use adhesives and finishes that are low in VOCs, further reducing the environmental impact. By supporting companies that follow sustainable practices, you’re helping promote eco-friendly production methods. It’s a simple way to make a big difference. Reason 3: Strand-Woven Bamboo Outperforms Traditional Hardwoods in High-Traffic Areas Strand-woven bamboo flooring is not only durable but also specifically designed to handle the rigors of busy spaces. The unique manufacturing process involves shredding bamboo fibers and compressing them under intense pressure, resulting in a flooring material harder than many traditional hardwoods like oak and maple. This high-density construction ensures exceptional resistance to dents, scratches, and wear, making strand-woven bamboo ideal for areas that experience heavy foot traffic. Entryways, kitchens, and living rooms often face constant use, and strand-woven bamboo holds up remarkably well under these conditions. Its strength allows it to maintain a fresh, polished look for years, reducing the need for frequent replacements or repairs. Additionally, strand-woven bamboo’s durability extends its versatility. For families with pets or young children, this type of flooring provides a worry-free surface that can handle the occasional spill or accidental scuff without showing signs of damage. It combines practicality with aesthetic appeal, ensuring your floors look great while withstanding daily use. Reason 4: Bamboo Flooring Contributes to Indoor Air Quality Creating a healthier indoor environment starts with choosing materials that promote clean air. Bamboo hardwood flooring contributes to this goal by incorporating low-VOC finishes, which limit the release of harmful chemicals into your home. Unlike some flooring options that can negatively impact air quality, bamboo provides a safer and healthier choice for your family. Bamboo’s natural resistance to mold and mildew further enhances its suitability for maintaining good indoor air quality. In homes where allergies or respiratory issues are a concern, bamboo flooring provides a hypoallergenic surface that doesn’t trap dust, pollen, or other allergens like carpets

engineered hardwood flooring
Flooring Advice

Engineered Hardwood Flooring: Why It’s Perfect for Modern Homes

Picture this: you walk into a room with wide planks of wood underfoot, their grain catching the light beautifully. The floor feels solid, looks high-end, and doesn’t make you worry about the everyday wear and tear of modern living. That’s the promise of engineered hardwood flooring. When designing or updating your home, flooring is crucial in setting the tone for your space. It’s the foundation that ties together your furniture, decor, and overall vibe. Engineered hardwood flooring offers the timeless look of real wood with added durability and flexibility, making it a top choice for today’s homeowners. In this blog, we’ll explore why engineered hardwood flooring stands out, its unique benefits for modern homes, and how it compares to other flooring options. Understanding Engineered Hardwood Flooring Engineered hardwood flooring offers a modern twist on the classic appeal of solid wood. It’s designed to combine style, durability, and versatility, making it a popular choice for homeowners looking to balance aesthetics with practicality. Let’s break it down. What is Engineered Hardwood Flooring? Engineered hardwood flooring is a type of flooring that uses a real hardwood veneer on top of a layered plywood or high-density fiberboard (HDF) core. This structure provides the look and feel of solid hardwood while addressing some of its limitations. Think of it as a smarter approach to traditional wood floors. The top layer, made from real wood, gives it the authentic beauty of natural grain patterns and textures. Beneath that, the core layers are engineered for stability, resisting warping or buckling in conditions where solid wood might struggle. This makes it suitable for areas like basements or rooms with fluctuating humidity levels. How Engineered Hardwood Flooring is Made The manufacturing process of engineered hardwood flooring is all about creating a durable and reliable product without sacrificing beauty. Top Layer: The top layer, also known as the wear layer, is a thin slice of real hardwood. It comes from species like oak, maple, or walnut, offering the same rich look and feel as solid wood. Core Layers: Beneath the veneer are multiple layers of plywood or HDF, arranged in a cross-grain pattern. This structure provides enhanced stability, making the flooring resistant to expansion, contraction, or warping. Bottom Layer: A backing layer made from wood or composite materials adds further stability and ensures the planks remain level. This layered design not only extends the lifespan of the flooring but also allows for easier installation and compatibility with various subfloors, including concrete. Popular Finishes and Styles One of the reasons engineered hardwood flooring is so popular is its variety of finishes and styles, making it adaptable to different tastes and home designs. Matte Finishes: Matte finishes are perfect for modern homes aiming for a sleek, understated look. They’re also practical, as they hide scratches and dirt better than glossier options. Glossy Finishes: If you want to add a bit of shine and elegance to your space, glossy finishes deliver a polished and sophisticated vibe. Textured Options: Hand-scraped or wire-brushed finishes add texture and character, giving your floors a more rustic or vintage feel while still fitting into contemporary aesthetics. As for styles, wide planks are a favorite in open-concept spaces, while narrower planks work well in traditional layouts. You can also choose from various wood species, each offering unique grain patterns and colors to match your home’s design. Benefits of Engineered Hardwood Flooring for Modern Homes Engineered hardwood flooring brings together form and function. It’s a versatile choice that meets the demands of modern living while enhancing the look of any space. Withstanding Humidity and Temperature Changes Engineered hardwood flooring is designed to handle changes in humidity and temperature better than traditional solid wood. Its layered construction makes it more stable, preventing warping, buckling, or cracking in areas with fluctuating conditions. For example, if you live in a region with hot summers and cold winters, engineered hardwood will adapt better than solid wood flooring. This makes it a great option for basements, kitchens, or any room where moisture levels vary. Enhancing Modern Interior Design Themes Modern homes often emphasize clean lines, open spaces, and contemporary aesthetics. Engineered hardwood flooring complements these themes perfectly. With a wide range of finishes and wood species available, you can match the flooring to minimalist, industrial, or mid-century modern designs. Light-colored planks can brighten a room, while darker tones add a sense of sophistication. Engineered hardwood’s versatility ensures it fits seamlessly into any design vision. Perfect for Open-Concept Living Spaces Open-concept layouts are a hallmark of modern homes, and engineered hardwood flooring enhances these spaces. Wide planks create a cohesive look, helping rooms flow naturally into one another. The flooring’s durability ensures it can handle high foot traffic often found in connected spaces like kitchens, dining areas, and living rooms. Its ability to maintain a uniform appearance across large areas makes it ideal for open-concept designs. Simplifying Cleaning and Maintenance For busy households, engineered hardwood flooring offers easy maintenance. The top wear layer resists stains and scratches, making daily cleaning straightforward. A quick sweep or light mop is usually enough to keep it looking great. Unlike carpets that trap dust and allergens, engineered hardwood provides a cleaner surface, contributing to better indoor air quality. Its durability also means fewer repairs or refinishing jobs over the years. Eco-Conscious Flooring Choice If sustainability is a priority, engineered hardwood is an eco-friendly option. Its construction uses less solid wood compared to traditional hardwood flooring, preserving natural resources. Many manufacturers also source wood from sustainable forests or use non-toxic adhesives, reducing the environmental impact. By choosing engineered hardwood, you’re making a greener choice for your home. Affordable Luxury for Modern Budgets Engineered hardwood provides the luxurious look of solid wood at a more accessible price point. It allows homeowners to achieve high-end aesthetics without exceeding their budget. Additionally, its durability reduces long-term costs associated with repairs and replacements. For those who want stylish, durable flooring without breaking the bank, engineered hardwood is a smart investment. Comparing Engineered Hardwood to Other Flooring Options Choosing the right flooring involves understanding the

how soon can you walk on laminate flooring after installation
Flooring Advice

How Soon You Can Walk on Newly Installed Laminate Floors

Laminate flooring changes how your home looks and feels. It’s durable, versatile, and works in almost any room. If you’ve recently installed laminate flooring, you might be wondering how soon you can walk on laminate flooring after installation. Imagine you just installed your new laminate floor. You’re eager to walk on it and see how it feels underfoot. But if the floor isn’t ready, stepping on it too soon can undo all the hard work. Planks might shift, adhesives might not set, or gaps might appear. By understanding the right timing and following expert advice, you can avoid these issues and keep your floor in great condition. This guide covers everything you need to know. It explains how laminate flooring is installed, what factors affect walking times, and what happens if you rush the process. Understanding Laminate Flooring Installation Each method of laminate flooring installation comes with its own timeline and preparation steps, and knowing these details helps you get the best results. Rushing can lead to issues, but understanding the process helps you avoid them. Types of Installation Methods Laminate flooring can be installed in three main ways: Floating Floors: These planks rest on an underlayment and aren’t attached to the subfloor. Because there’s no adhesive involved, floating floors are usually ready to walk on as soon as the installation is done. Glued Laminate: This method uses adhesive to secure each plank to the subfloor. While it provides a strong bond, the glue needs time to dry. You’ll need to wait 24-48 hours before walking on these floors. Click-and-Lock Laminate: This popular method snaps planks together like puzzle pieces. It doesn’t require glue and is typically ready for use immediately after installation. Why Timing Matters After Installation Waiting after installation might feel frustrating, but it makes a big difference. Walking on laminate flooring too soon can cause: Plank Shifting: When the floor hasn’t settled, walking can move the planks out of place, creating uneven surfaces. Weak Adhesive Bonds: For glued laminate, premature use can prevent the adhesive from setting properly, leading to loose planks over time. Visible Damage: Gaps, cracks, and other issues can appear if the floor is used too soon. Taking the time to let your floor settle and dry ensures a longer lifespan and avoids costly repairs. While it might be tempting to start using your new floor right away, a little patience goes a long way in maintaining its quality. Factors That Affect Walking Time How soon you can walk on laminate flooring after installation depends on several factors. Understanding these helps you plan better and avoid unnecessary delays Environmental Conditions The room’s temperature and humidity levels directly impact how quickly the floor settles or adhesive dries. For example: High Humidity: Moisture in the air slows down the drying process for adhesives and can cause planks to expand or warp. Extreme Temperatures: Cold temperatures can delay adhesive curing, while excessive heat may cause planks to shift or contract. Good ventilation speeds up the drying process and ensures the flooring settles correctly. Keeping the room’s conditions stable during and after installation is essential for avoiding problems. If you’re in a humid or temperature-unstable area, this might extend how soon you can walk on laminate flooring after installation. Subfloor Preparation and Its Impact A properly prepared subfloor is the foundation of a successful laminate installation. If the subfloor isn’t level, clean, or dry, it can delay the entire process. For instance: Uneven Surfaces: An uneven subfloor may require leveling before installation, which adds time. Moisture Problems: A damp subfloor can interfere with adhesive bonds and may lead to long-term issues like warping. Professional installers often check and prepare the subfloor beforehand to ensure the laminate flooring performs as expected. Neglecting this step can lead to delays and potential damage down the line. Type of Adhesive or Underlayment Used The adhesive or underlayment plays a big role in how quickly your floor is ready for use: Fast-Drying Adhesives: These adhesives can set in as little as 12 hours, allowing for quicker use of glued laminate flooring. Standard Adhesives: These require a longer drying time, typically 24-48 hours. Floating Floors with Underlayment: Since floating floors don’t use adhesive, you can walk on them immediately after installation. Knowing the type of adhesive or underlayment used helps you estimate when it’s safe to start walking on your new floor. Recommended Waiting Times for Different Methods Each installation method comes with its own recommended waiting time. Sticking to these timelines ensures your floor remains durable and functional. Floating Floors Floating floors are among the quickest options to become usable. Since they rest on an underlayment and aren’t glued down, there’s no drying time involved. As soon as the final plank is clicked into place, you can walk on the surface. This makes floating floors a popular choice for families who need quick and hassle-free installation. Even so, consider light foot traffic initially to let the planks fully settle. Glued Laminate Glued laminate flooring requires more patience but delivers a strong and durable bond. Adhesives used for this method typically take 24-48 hours to dry and cure properly. Walking on the floor before this time can disrupt the adhesive, leading to loose or misaligned planks. If possible, wait the full 48 hours to ensure optimal durability and stability. Ask your installer about the specific adhesive used to confirm the drying time and avoid any premature use. Click-and-Lock Laminate Click-and-lock laminate is the most convenient in terms of usability. Since it doesn’t rely on adhesive, the floor is ready for use immediately after installation. However, allowing a few hours for the floor to settle can make a difference in long-term performance. Light usage during the first day is fine, but avoid dragging heavy furniture or engaging in high-impact activities right away to maintain the floor’s integrity. Consequences of Walking Too Soon Walking on your laminate flooring too soon can lead to several issues. Let’s explore what can go wrong and why patience pays off. Misaligned Planks Stepping on the floor too early can shift planks out of place. This creates uneven surfaces

Flooring Installation
Flooring Advice

Transform Your Space with Expert Flooring Installation Services

Flooring changes the way a space looks and feels. It’s the foundation you walk on daily, and it affects comfort, safety, and energy use. Whether you’re redoing one room or the entire property, your flooring installation can make or break the impact of the upgrade. Think about stepping into a living room with perfectly aligned hardwood that brings out the natural light. Or imagine a kitchen with vinyl flooring that resists spills and is easy to clean. When installed professionally, floors can deliver these benefits without the stress of mistakes or wasted materials. This guide shows why professional flooring installation matters, explores different types of flooring and explains how hiring experts makes a difference. Why Professional Flooring Installation Matters Installing flooring might seem simple, but mistakes can lead to uneven surfaces, damage, or even safety risks. Professionals bring the tools, skills, and experience to ensure the job is done right. The benefits far outweigh the initial costs. Ensuring Durability and Longevity The durability of your floors depends on how they’re installed. Materials like hardwood, vinyl, and tile need proper preparation and placement to hold up over time. Experts prepare subfloors by cleaning, leveling, and drying them to prevent future issues like cracking or moisture damage. For example, hardwood expands and contracts with temperature changes. Without proper spacing, it can buckle or leave gaps. Similarly, tiles need precise grout lines and strong adhesive to stay secure. Professional installation ensures your floors last longer and perform better. The Role of Precision in Aesthetics Precision makes floors look polished. Small mistakes in measurements or alignment can ruin the overall look of a room. Professionals cut materials with advanced tools to fit perfectly, ensuring seamless edges and smooth transitions. This is especially important for intricate tile patterns or consistent laminate plank spacing. Accurate installation also minimizes waste. By measuring and cutting precisely, professionals reduce material loss, saving you money. Types of Flooring for Different Needs Choosing the right flooring depends on how you use the space, your budget, and the look you want. Here are some common options and their benefits. Hardwood: A Timeless Choice Hardwood floors add value and elegance to a home. They’re ideal for living rooms, bedrooms, and dining areas. Options like oak, maple, and cherry offer unique grain patterns and tones. Professional installation is key. Experts acclimate the wood to the room’s humidity before laying it down, reducing the risk of expansion or contraction. They also ensure planks fit together perfectly for a smooth, uniform surface. Laminate and Vinyl: Affordable Alternatives Laminate and vinyl are great budget-friendly options. Laminate mimics wood or stone but is easier to maintain. Vinyl resists moisture, making it a good choice for kitchens, bathrooms, and laundry rooms. Experts ensure these materials perform well by securing seams and edges to block water from getting underneath. They also address subfloor imperfections that could cause uneven surfaces or wear. Tile Flooring: For High-Traffic Areas Tile is durable and  versatile, making it perfect for entryways, kitchens, and bathrooms. It resists moisture and stains, and it’s easy to clean. Ceramic, porcelain, and natural stone tiles come in a wide range of styles to fit any design. Professional installation ensures tiles are level, grout lines are even, and adhesives hold everything securely. This attention to detail keeps tiles from cracking or shifting over time, ensuring they remain both functional and stylish. The Expert Flooring Installation Process Understanding the flooring installation process helps you see the value of hiring professionals. Here’s what happens during a professional flooring installation: Consultation and Assessment Professionals assess your space and discuss your needs. They look at room dimensions, lighting, and usage to recommend the best flooring materials. This step includes identifying any unique challenges in the room, such as uneven surfaces or areas prone to moisture, and offering tailored solutions. Professionals also help homeowners understand how different materials perform in specific conditions. Preparation They prepare the subfloor by cleaning, levelling, and addressing moisture issues. For some materials, they add underlayment to improve performance. Subfloor preparation ensures that the flooring material will adhere properly and stay durable over time. It also prevents common problems like squeaky floors or uneven surfaces, which can occur if the base is not adequately prepared. Material Acclimation Materials like hardwood and laminate need to adjust to the room’s temperature and humidity. This step prevents problems like warping later. Acclimation typically involves leaving the materials in the room for at least 48 hours to stabilize. Professionals monitor the conditions to ensure the materials are ready for installation. Accurate Measurements and Cutting Professionals take precise measurements to reduce waste and ensure alignment. They use tools to cut materials for a perfect fit, even in corners and edges. This step minimizes gaps between planks or tiles, ensuring a clean and seamless appearance. Precise cutting also reduces the need for adjustments later, saving time and resources. Installation The method depends on the material. Hardwood is nailed or glued, tiles are adhered with mortar and grout, and laminate snaps into place. Professionals make sure each piece is secure. They also handle challenging layouts, such as curved edges or intricate patterns, ensuring the final result meets the design vision. Finishing Touches They complete the job with steps like sealing, grouting, or trimming. These ensure the floor lasts and functions well. For example, sealing hardwood floors protects them from moisture, while grout work on tiles prevents dirt accumulation and ensures stability. Professionals also add transitions between rooms to create a cohesive flow. Cleanup Professionals clean the area and make the floor ready for use. They also provide instructions for maintaining the flooring. Proper cleanup removes debris and ensures no residue or tools are left behind, allowing homeowners to immediately enjoy their new floors. Positive Effects of Expert Flooring Installation Hiring experts to install your flooring gives you more than just good looks. A professional job makes your floors work better, feel better, and last longer. When done right, flooring transforms your space into something functional and enjoyable. Let’s look at how expert installation connects to

when-to-repair-your-flooring
Flooring Advice

Signs It’s Time to Repair Your Flooring: Expert Tips & Solutions

Is Your Floor Telling You Something? Signs It’s Time to Repair Your Flooring Your floors are often the unsung heroes of your home, enduring constant foot traffic, furniture movement, and accidental spills. Over time, they can show signs of wear and damage, signaling that it’s time for a repair. Addressing these issues promptly can save you money and prevent further damage. Let’s dive deeper into the signs and solutions for flooring repairs. Recognizing the Signs: When to Repair Your Flooring 1. Squeaks and Creaks Persistent squeaks and creaks indicate loose floorboards or structural instability in the subfloor. While occasional noise may be harmless, frequent or loud squeaking demands attention. It’s often a sign that your floorboards are rubbing against each other or the subfloor due to inadequate fastening. Left unchecked, this can worsen over time. Solution: Secure loose boards with screws or nails, and consider adding padding or adhesive between layers to reduce friction. For widespread squeaking, a professional may need to assess the subfloor. 2. Visible Damage: Scratches, Dents, and Cracks Surface damage, such as deep scratches, dents, or cracks, compromises both aesthetics and functionality. Scratches can lead to further wear, while cracks might expand, allowing moisture to seep into the subfloor. Solution: Use wood fillers for scratches and dents on hardwood, and replace cracked tiles or planks as needed. Regular maintenance, like refinishing hardwood floors, can also restore their appearance. 3. Water Damage and Staining Water is one of the most common culprits of flooring damage. Signs include warping, discoloration, mold growth, or a musty smell. Even minor stains may indicate underlying water issues. Solution: Identify and fix the source of water intrusion. Replace affected boards or tiles and use waterproof sealants to protect against future damage. 4. Loose Tiles or Planks Loose tiles or planks are more than an annoyance—they’re a tripping hazard and a sign of subfloor or adhesive issues. Solution: Reattach tiles or planks using the appropriate adhesive. For larger areas, you may need to inspect and repair the subfloor. 5. Uneven Surfaces Uneven flooring can cause furniture instability and tripping hazards. It often points to foundational issues or subfloor settling. Solution: Use a self-leveling compound for minor unevenness. For more significant issues, consult a professional to address subfloor problems. 6. Pests Insect infestations, such as termites or wood-boring beetles, can weaken your flooring’s structure. Signs include small holes, frass (insect droppings), or visible damage to wood. Solution: Contact a pest control specialist immediately. Once the infestation is resolved, repair or replace the damaged flooring. Solutions That Work: Repairing Your Flooring Repairing your flooring doesn’t have to be a daunting task. Whether you’re dealing with minor issues or tackling more significant damage, there are effective solutions to restore your floors to their former glory. Here’s a deeper dive into the most reliable approaches: 1. Minor Repairs: DIY Solutions For minor issues like small scratches, dents, or loose planks, DIY solutions are often sufficient. Scratch repair kits, wood fillers, or touch-up markers are readily available and easy to use. If dealing with loose planks, a simple application of adhesive or tightening the existing fastening can resolve the issue. Ensure you follow the manufacturer’s instructions or watch tutorials for specific flooring types, as improper techniques can exacerbate the problem. For instance, over-sanding can permanently damage hardwood, and excessive adhesive can cause uneven surfaces. A steady hand and patience are key to successful DIY repairs. 2. Professional Help When faced with complex problems, such as extensive water damage, pest infestations, or structural subfloor issues, it’s time to call in the professionals. Water damage can lead to warping, mold growth, and compromised stability, which requires expert evaluation and treatment. Flooring specialists come equipped with advanced tools and expertise to handle these challenges effectively. Pest infestations, such as termites or wood-boring insects, also demand professional attention to address the root cause and prevent recurrence. Hiring an experienced contractor ensures a durable and safe fix, saving you money in the long run. 3. Choosing the Right Materials When replacing sections of your floor, selecting materials that match the existing surface is crucial for maintaining aesthetic consistency. Pay attention to texture, color, and finish. Opt for high-quality adhesives, sealants, and underlayment to ensure durability and longevity. These details can make the difference between a temporary patch and a lasting solution. By choosing the right approach for your flooring needs, you can keep your floors looking beautiful and functioning effectively for years to come. A Final Thought Your flooring is more than just a surface, it’s a foundation for your home’s functionality and aesthetic appeal. Recognizing the signs of damage and addressing them promptly ensures a safe and beautiful living space. Whether it’s a DIY fix or professional repair, knowing when to act can save you money and extend the life of your floors. Don’t ignore what your floors are telling you; repairing them now is an investment in your home’s future. Don’t ignore the signs! Restore your flooring’s beauty and safety with Cardenas Flooring. From repairs to replacements, we’ve got you covered. Contact us today for expert solutions! FAQs How do I know if my floor needs repair or replacement? If your flooring has minor scratches, small cracks, or occasional squeaks, repairs may suffice. However, widespread damage like extensive water damage, deep cracks, severe warping, or persistent structural issues often indicates the need for replacement. Consulting a professional can help you determine the best course of action based on the extent of the damage and your budget. How can I prevent my flooring from getting damaged in the first place? Regular maintenance is key. Clean your floors using appropriate methods for the material, address spills immediately, and use furniture pads to prevent scratches. In high-traffic areas, consider placing rugs or mats for added protection. Keeping your home’s humidity levels stable and ensuring proper sealing during installation can also help prevent moisture-related issues. Can I repair water damage on my flooring, or should I replace it? The decision depends on the extent of the

how-to-install-hardwood-flooring-on-plywood
Flooring Advice

How to Install Hardwood Flooring on Plywood: A Step-by-Step Guide

Hardwood flooring is synonymous with elegance, warmth, and durability. However, the challenge arises when your subfloor is plywood. Can you achieve a professional, stunning finish? The answer is a resounding yes! With the right tools, preparation, and techniques, you can successfully install hardwood flooring over plywood and elevate your home’s aesthetic. This guide provides an expert walkthrough, ensuring your dream of hardwood floors becomes a reality. Preparing the Plywood Subfloor: The Bedrock of Success 1. Inspect and Repair Examine the plywood for damage, loose boards, or gaps. Replace damaged sections and secure loose boards using screws to create a sturdy base. 2. Level the Surface Using a long level, check for unevenness. Apply self-leveling compound to low spots to ensure a flat surface—this step is critical for preventing squeaky or uneven floors. 3. Clean Thoroughly Sweep, vacuum, and wipe the plywood to remove dust, debris, and adhesive remnants. A clean surface promotes better adhesion and ensures a flawless installation. Selecting the Right Materials Solid Hardwood vs. Engineered Hardwood Solid Hardwood: Timeless and refinable, ideal for dry environments. Engineered Hardwood: Engineered hardwood is moisture-resistant and dimensionally stable, better for humid conditions or basements. Choosing Underlayment A quality underlayment provides a moisture barrier, sound insulation, and a smooth surface. Options include foam, cork, and rubber. Select one that suits your climate and flooring type. Acclimating Your Hardwood Allow your hardwood planks to acclimate to the room’s temperature and humidity for 3–7 days. This step minimizes expansion or contraction after installation, ensuring a long-lasting, stable floor. Step-by-Step Installation Guide 1. Plan and Measure Measure your room dimensions. Plan the board layout to minimize waste and ensure an aesthetically pleasing result. 2. Install the First Row Start along the longest, straightest wall. Leave a 1/4-inch expansion gap using spacers. Secure planks with nails or adhesive based on your chosen method. 3. Lay Subsequent Rows Stagger seams for a natural look. Use a tapping block to fit planks tightly. Check alignment frequently to maintain straight rows. 4. Cut and Fit Use a jigsaw for intricate cuts around pipes and doorways. Measure carefully to ensure a snug, seamless fit. 5. Finish with Baseboards and Transitions Install baseboards and transition strips to cover gaps and provide a polished appearance. Finishing and Maintenance Protecting Your Investment Sweep Regularly: Prevent scratches by removing debris. Avoid Excess Moisture: Use a damp mop sparingly. Add Furniture Pads: Minimize wear from heavy furniture. Refinishing Options Solid hardwood allows for sanding and refinishing to refresh its appearance, adding decades to its lifespan. Common Installation Challenges and Solutions Installing hardwood flooring on plywood can be a rewarding DIY project, but it’s not without its challenges. Addressing potential issues upfront ensures a smooth process and long-lasting results. Here’s a closer look at common installation challenges and their solutions: Uneven Subfloor An uneven subfloor is one of the most critical challenges, as it can compromise the stability and appearance of your hardwood flooring. Uneven surfaces lead to creaky or wobbly floors and may cause gaps or misalignment in your boards over time. Solution: Before installation, thoroughly inspect the plywood subfloor for high spots, dips, or warping. Use a self-leveling compound to even out any irregularities. Follow the manufacturer’s instructions to mix and apply the compound, ensuring it fills low spots and creates a smooth surface. Allow it to cure fully before proceeding. Skipping this step can lead to costly repairs down the road. Gaps Between Planks Gaps often occur due to improper spacing during installation or inadequate acclimation of the hardwood to the room’s temperature and humidity. These gaps not only detract from the aesthetics but can also allow debris to accumulate, potentially damaging the floor. Solution: Ensure the hardwood planks are properly acclimated to the room for at least 48-72 hours before installation. Use spacers during installation to maintain consistent expansion gaps along the walls. If gaps appear after installation, carefully disassemble the affected planks and reinstall them securely. Squeaky Boards Squeaky floors can be a major nuisance and often result from loose plywood sections rubbing against the joists. Solution: Secure all loose plywood sections to the joists with screws before installing the hardwood flooring. Use a drill to tighten screws evenly across the subfloor. This proactive step eliminates the potential for squeaks and ensures a firm foundation for your hardwood. Wrapping It Up With this guide, installing hardwood flooring on plywood becomes a manageable and rewarding project. From preparation to maintenance, each step contributes to a durable and beautiful floor. Take your time, follow the process carefully, and enjoy the timeless charm of hardwood in your home. For additional support or professional assistance, don’t hesitate to contact Cardenas Flooring experts. Your stunning new hardwood floor awaits! Frequently Asked Questions (FAQs) Can I install hardwood flooring directly over plywood without underlayment? While it’s possible to install hardwood flooring directly over plywood, underlayment is highly recommended. It provides a moisture barrier, sound insulation, and cushioning, which enhances the flooring’s durability and comfort. Without underlayment, moisture can seep through, and the floor may develop squeaks or uneven spots. Always consult the manufacturer’s instructions for specific requirements. How do I know if my plywood subfloor is suitable for hardwood flooring? Your plywood subfloor must be clean, dry, and level to ensure proper installation. Inspect for damage, loose sections, or gaps. The subfloor should be at least 3/4-inch thick to provide adequate support for hardwood. If you notice significant imperfections, repair or replace the damaged areas before proceeding with installation. A sturdy base is critical for a lasting hardwood floor. What’s the best way to prevent squeaky floors after installation? Squeaky floors often occur due to loose subflooring or improper installation. Before installing hardwood, ensure the plywood is securely fastened to the joists using screws. Adding underlayment also helps minimize noise. Post-installation, if squeaks persist, identify the affected areas and address them by adding screws or adhesive under the floor. How can I maintain my hardwood flooring to keep it looking new? Regular maintenance includes sweeping or vacuuming to remove dirt and debris that can scratch the surface.

how-to-install-lifeproof-flooring
Flooring Advice

How to Install Lifeproof Flooring: A Step-by-Step Guide to a Durable Finish

So, you’ve chosen a Lifeproof flooring smart choice! Known for its resilience and aesthetic appeal, Lifeproof flooring is an excellent option for homeowners who want both beauty and durability. But now you’re left staring at boxes of planks, wondering if you’ve bitten off more than you can chew. Fear not! Installing Lifeproof flooring is a manageable DIY project with the right guidance. This expert guide will walk you through the process step-by-step, ensuring you achieve a stunning, long-lasting finish without the headaches. Let’s get started! Preparing for Lifeproof Flooring Installation: Laying the Groundwork The key to a successful installation lies in the preparation. Skipping these steps can lead to uneven floors, unnecessary stress, and costly repairs down the line. 1. Subfloor Assessment: The Foundation of Success Your subfloor must be stable, clean, and level. Uneven surfaces can lead to a poor finish, with gaps, creaks, or visible imperfections. Inspect: Check for cracks, bumps, or loose areas. Repair: Use a self-leveling compound to address significant imperfections. Clean: Remove all dirt, debris, and adhesive residue to ensure proper plank adhesion. 2. Acclimation is Key: Letting the Flooring Breathe Lifeproof flooring needs to acclimate to the room’s environment. Why it matters: This helps the planks adjust to the room’s temperature and humidity, preventing buckling or gapping after installation. How to do it: Leave the unopened boxes in the installation room for at least 48 hours. 3. Gathering Your Tools: Arming Yourself for the Job Having the right tools on hand will streamline the process. Gather the following: Measuring tape Utility knife Spacers Tapping block Pull bar Underlayment (if needed) Safety gear: gloves and goggles The Installation Process: A Step-by-Step Guide to How to Install Lifeproof Flooring 1. Laying the First Row Start in a corner of the room, aligning the first row of planks with spacers to maintain an expansion gap around the walls. Pro Tip: Work parallel to the longest wall for a visually appealing layout. Be precise: Ensure the first row is straight, as it sets the foundation for the entire installation. 2. Row-by-Row Installation Interlock the planks using the click-and-lock mechanism. Use a tapping block and pull bar: Ensure each plank fits snugly into place without damaging the edges. Check alignment frequently: Misaligned planks can create gaps and compromise the overall appearance. 3. Navigating Obstacles Measure and cut planks to fit around doorways, pipes, or other fixtures. Tools to use: A sharp utility knife or jigsaw for clean, precise cuts. Pro Tip: Save scrap pieces for small sections or tricky areas. 4. Finishing Touches Once all planks are in place: Remove spacers. Install baseboards and transition strips to cover expansion gaps. Inspect for any loose planks or uneven areas. Maintaining Your Lifeproof Flooring: Keeping it Pristine A durable floor like Lifeproof requires minimal but consistent care. Regular cleaning: Sweep or vacuum to remove dirt and debris. Mopping: Use a damp mop with a pH-neutral cleaner; avoid soaking the floor. Avoid abrasives: Steer clear of harsh chemicals and scrubbers that can damage the finish. Final Words Lifeproof flooring combines beauty, durability, and ease of maintenance, making it a popular choice for modern homes. By following these detailed steps and prioritizing preparation, you can transform your space with a flawless, long-lasting floor. Whether you’re a seasoned DIY enthusiast or a beginner, this guide ensures your Lifeproof flooring installation is a success. So, roll up your sleeves, grab your tools, and create a floor that stands the test of time! Upgrade your space with expertly installed Lifeproof flooring! Let Cardenas Flooring bring durability and style to your home. Contact us today for a free consultation. FAQs What tools are required for Lifeproof flooring installation? Essential tools include a measuring tape, utility knife, tapping block, pull bar, spacers, and a rubber mallet. Depending on your space, you may also need a jigsaw for precise cuts around door frames or pipes. If installing over concrete, a moisture barrier or underlayment may be necessary. Refer to the manufacturer’s instructions for any specific tools required for your flooring type. Can Lifeproof flooring handle heavy furniture or appliances? Yes, Lifeproof flooring is designed to support heavy furniture and appliances. To prevent scratches or dents, use protective pads under furniture legs and avoid dragging items across the floor. When moving appliances, place them on sliders or a protective sheet to minimize stress on the flooring surface. What happens if a plank gets damaged after installation? If a plank is damaged, it can be replaced without removing the entire floor. Use the pull bar to carefully remove surrounding planks until you reach the damaged one. Replace it with a new plank and reassemble the floor. Always keep extra planks from your initial purchase for such repairs. Can Lifeproof flooring be installed in areas with extreme temperature changes? Lifeproof flooring is designed to withstand temperature fluctuations but should not be installed in unheated spaces or areas with consistent temperature extremes. Acclimate the flooring to the room’s temperature for at least 48 hours before installation to prevent expansion or contraction issues. Always leave an expansion gap around the room’s perimeter. Is underlayment necessary for Lifeproof flooring? Underlayment may not always be necessary, as some Lifeproof flooring comes with a pre-attached underlayment. However, in cases of uneven subfloors or installations over concrete, an additional underlayment may be recommended to provide cushioning, soundproofing, and moisture resistance. Check the manufacturer’s guidelines for specific recommendations.

how-to-install-laminate-flooring-on-concrete
Flooring Advice

How to Install Laminate Flooring on Concrete: A Complete Guide

Concrete floors are durable and practical but lack the warmth and character that laminate flooring brings. Installing laminate on concrete is an excellent way to upgrade your space, but it’s not without challenges. From ensuring the subfloor is level and moisture-proof to laying each plank correctly, the process requires meticulous attention to detail. Don’t worry. This guide will walk you through every step, ensuring a seamless transition from cold concrete to cozy laminate. Preparing the Concrete Subfloor: The Key to Success Proper preparation is the foundation of a successful laminate flooring installation. Skipping or rushing this step can lead to uneven surfaces, squeaks, and long-term damage. Follow these essential steps: 1. Assessing Your Concrete Subfloor Begin with a thorough inspection of the concrete: Check for Imperfections: Look for cracks, holes, or bumps. Test for Levelness: Use a level to ensure the floor is even. Variations greater than 1/8 inch over 6 feet require attention. Assess Structural Integrity: Ensure the subfloor can support the laminate flooring. 2. Cleaning and Repairing Cleanliness is vital: Vacuum and Sweep Thoroughly: Remove all dirt and debris. Patch Cracks: Use a concrete patching compound to fill gaps and holes. Allow adequate drying time. Remove Residues: Any adhesive or sealant left from previous installations must be cleared. 3. Moisture Control Concrete is porous and prone to moisture, which can warp laminate flooring. Test Moisture Levels: Use a moisture meter to check humidity. If levels are too high, delay the installation. Install a Vapor Barrier: Lay polyethylene sheeting to block moisture from seeping into the laminate. Tape seams securely. Installing the Underlayment: Cushioning and Protection Underlayment is crucial for noise reduction, cushioning, and moisture protection. 1. Choosing the Right Underlayment Select an underlayment designed for concrete. Foam underlayments with vapor barriers work best for moisture-prone environments. 2. Installing the Underlayment Measure and Cut: Roll out the underlayment and cut it to fit the room dimensions. Lay Smoothly: Avoid overlapping and ensure a flat surface. Tape seams with vapor-resistant tape. Secure the Edges: Attach the underlayment snugly against walls to prevent shifting during laminate installation. Installing the Laminate: Putting It All Together Now the fun begins! Here’s how to install laminate flooring on concrete: 1. Acclimate the Planks Allow the laminate to sit in the room for 48 hours to adjust to temperature and humidity. This step prevents post-installation expansion or contraction. 2. Starting Point Choose a Starting Wall: Begin along the longest, straightest wall. Use Spacers: Maintain a 1/4-inch gap between the planks and the wall to accommodate expansion. 3. Laying the Planks Click-Lock System: Gently tap planks together using a tapping block and mallet. Avoid damaging the edges. Stagger Seams: Offset the seams in each row for structural integrity and visual appeal. Precision Cuts: Use a laminate cutter or fine-tooth saw for clean cuts around obstacles. 4. Final Touches Install Baseboards and Trim: Cover the expansion gaps for a polished look. Add Transition Strips: Seamlessly transition between laminate and adjacent flooring. Troubleshooting Common Problems: Effective Solutions Even with meticulous planning, unforeseen challenges can arise during or after installing laminate flooring. Identifying and addressing these issues promptly is crucial for maintaining the integrity and appearance of your flooring. Here’s how to resolve some common problems effectively: Uneven Subfloor An uneven subfloor is one of the most common causes of creaking, shifting, or uneven laminate surfaces. If this occurs, it indicates that the subfloor wasn’t adequately leveled before installation. To fix this: Lift the Affected Planks: Carefully remove the planks in the problematic area without damaging them. Level the Subfloor: Apply a self-leveling compound to the uneven sections. Follow the manufacturer’s instructions for drying time and ensure a completely smooth surface. Reinstall the Planks: Once the compound is set and dry, reinstall the laminate planks, ensuring they fit securely. Moisture Issues Warping, buckling, or swelling of laminate flooring often signals moisture problems. This can happen if the vapor barrier wasn’t installed correctly or if moisture has seeped in due to leaks. Here’s what to do: Inspect for Leaks: Identify and fix any water source, such as leaks from pipes or appliances. Check the Vapor Barrier: Ensure that the moisture barrier is intact and properly sealed. If compromised, replace it in the affected area. Dry the Floor: Use dehumidifiers and fans to dry the area before reinstalling the laminate. Gaps Between Planks Gaps between planks can result from improper fitting during installation or inadequate acclimation of the flooring. To address this: Dismantle the Affected Planks: Remove the planks in the area with gaps. Reinstall Securely: Reinstall the planks, ensuring a snug fit and using spacers for consistent alignment. Acclimation Matters: Before reinstalling, ensure the planks have acclimated to the room’s temperature and humidity to minimize expansion or contraction. By addressing these issues proactively and carefully, you can preserve the durability and aesthetics of your laminate flooring, ensuring a smooth and lasting installation. Wrapping It Up Installing laminate flooring on concrete is a rewarding project that enhances your home’s beauty and functionality. With meticulous preparation, the right materials, and a little patience, you can achieve professional-looking results. Enjoy the warmth, style, and durability of your new laminate flooring, and take pride in the fact that you did it yourself! Transform your concrete floors with expert laminate flooring installation! Trust Cardenas Flooring for precision, durability, and a flawless finish. Contact us today for a free quote! FAQs Can laminate flooring be installed directly on concrete? Yes, laminate flooring can be installed on concrete, but proper preparation is critical. Clean the surface thoroughly, repair any cracks, and ensure it’s level. Additionally, test for moisture levels and install a vapor barrier to prevent moisture from damaging the flooring. Skipping these steps can lead to uneven surfaces, buckling, or other issues that compromise the floor’s longevity. How long does it take to install laminate flooring on concrete? The time required depends on the size of the room, your experience level, and the condition of the subfloor. Preparing the concrete can take 1-2 days, and the installation itself may take another 1-3 days. Allow extra time for acclimating the planks to the room’s temperature and humidity to avoid post-installation expansion or contraction issues. Do I need

how-to-install-wood-flooring
Flooring Advice

How to Install Wood Flooring: A Complete DIY Guide

There’s nothing quite like the look and feel of wood flooring—classic, warm, and timeless. But installing it yourself? That might feel overwhelming. Don’t worry! With the right tools, planning, and step-by-step guidance, you can tackle this project with confidence. Whether you’re upgrading a single room or your entire home, this guide will teach you how to install wood flooring like a seasoned pro. Planning Your Wood Flooring Installation Project Preparation is crucial. Proper planning can save you time, money, and headaches down the road. Here’s how to get started: 1. Choosing the Right Wood Flooring The type of wood you choose impacts cost, durability, and overall aesthetics. Key considerations include: Solid Hardwood vs. Engineered Wood: Solid hardwood lasts longer but can be more challenging to install. Engineered wood is more moisture-resistant and easier to handle. Species: Options like oak, maple, and cherry offer various hardness levels and appearances. Pre-finished vs. Unfinished: Pre-finished wood saves time but limits customization, while unfinished allows for on-site staining and sealing. 2. Measuring Your Space Accurate measurements are critical. Include all nooks and crannies in your calculations, and add 10% to account for waste, cutting errors, and future repairs. A reliable tape measure is your best friend. 3. Gathering the Right Tools You’ll need: A measuring tape and pencil A saw (circular or miter) Hammer and pry bar Tapping block and pull bar Spacer wedges Safety equipment (glasses, gloves, and dust mask) Underlayment material, if needed Step-by-Step Guide: How to Install Wood Flooring 1. Preparing the Subfloor Ensure the subfloor is clean, dry, and level. Remove old flooring, nails, or debris. Use a self-leveling compound to address any uneven spots. A solid foundation is essential for a flawless installation. 2. Installing Underlayment Underlayment reduces noise, adds cushioning, and acts as a moisture barrier. Roll it out and secure it according to the manufacturer’s guidelines. Overlap seams slightly for full coverage. 3. Acclimating the Wood Let your wood planks acclimate to the room’s temperature and humidity for at least 48 hours before installation. This prevents future warping or gaps due to expansion and contraction. 4. Laying the First Row Start along the longest, straightest wall. Use spacer wedges to maintain a 1/4-inch gap between the wood and the wall for expansion. Align the first row carefully—it sets the tone for the entire installation. 5. Installing Subsequent Rows Fit the planks together using the tongue-and-groove system. Use a tapping block to ensure tight seams without damaging the wood. Stagger the joints for a more natural appearance and added stability. 6. Cutting and Fitting Around Obstacles Measure carefully for doorways, vents, and other obstacles. Use a jigsaw or handsaw for precision cuts. Double-check your measurements before cutting to avoid waste. 7. Adding Finishing Touches Remove spacers, install baseboards, and add transition strips to cover gaps between rooms. Sweep or vacuum the floor to remove dust and debris. Troubleshooting Common Problems: Ensuring a Flawless Wood Floor Installation Even with meticulous planning and execution, challenges can arise during wood floor installation. Addressing these problems promptly ensures a long-lasting and visually appealing result. Here are common issues and how to resolve them: Uneven Subfloor An uneven subfloor is a frequent culprit behind creaky or uneven flooring. Before installation, carefully inspect the subfloor for high spots, dips, or irregularities. Use a self-leveling compound to even out the surface. Apply the compound according to the manufacturer’s instructions, ensuring it fills low areas and creates a flat, smooth base. Allow sufficient drying time before proceeding. Skipping this step can lead to structural instability and premature wear. Gaps Between Planks Gaps can detract from your floor’s appearance and compromise its durability. To avoid this, ensure each plank is tightly fitted during installation. Use spacers consistently to maintain uniform gaps around the perimeter for expansion, but make sure the planks themselves fit snugly together. Recheck alignment after laying each row and use a tapping block to secure tight joints. Plank Movement Movement or shifting of planks usually points to an insecure subfloor or underlayment. Double-check that the subfloor is properly anchored and the underlayment is evenly spread without wrinkles or gaps. If planks continue to move, inspect for moisture issues or loose fasteners. Proper installation and maintenance of all layers prevent future movement. By proactively addressing these issues, you’ll ensure a smooth, professional-quality finish. Finishing Up Installing wood flooring yourself is an achievement worth celebrating. It requires effort and attention to detail, but the results are rewarding: a beautiful, durable floor that transforms your space. By following this guide, you’ve mastered how to install wood flooring and saved on installation costs. Now, take a moment to admire your handiwork—you’ve earned it! Looking for professional flooring services in Texas? Contact Cardenas Flooring and book your service now. FAQs How long does it take to install wood flooring? The installation time depends on the room’s size, preparation, and your experience. A moderately sized room (200–400 sq. ft.) might take 2–3 days for a beginner, including subfloor preparation and finishing touches. Acclimating the wood to the room’s conditions adds an additional 48–72 hours. Professionals might complete the same project in 1–2 days. Can I install wood flooring over existing flooring? Yes, wood flooring can be installed over existing flooring, provided the surface is level, clean, and stable. Flooring types like concrete, tile, or plywood are suitable bases, while carpet must be removed. Consider underlayment to address moisture or sound issues. If the subfloor isn’t even, it may require leveling before installation. Is underlayment necessary for wood flooring? Underlayment isn’t always required but is highly recommended in most cases. It provides sound insulation, moisture protection, and added comfort underfoot. If your subfloor is concrete or uneven, an underlayment ensures a smooth installation and prolongs the life of your wood flooring. Check your flooring manufacturer’s recommendations. What are the common mistakes to avoid when installing wood flooring? Key mistakes include failing to acclimate the wood to room conditions, not leveling the subfloor, and skipping the expansion gap around walls. These errors can lead to warping, uneven flooring, or

Scroll to Top